User Permissions & Roles
Control user access to the Doohly platform.
Overview
User permissions and roles allow you to limit user access to specific areas of the Doohly platform. This ensures that users can only interact with the sections relevant to their role.
System Roles
By default, the following system roles are included in all spaces. These roles cannot be edited or deleted, but users can still be assigned to them:
- Administrator: Full access to manage everything.
- Billing: Access to billing information only.
- Content Scheduler: Can manage the creative library and assign/remove creatives to/from bookings.
- Manager: Can manage and view everything except billing and roles.
- Scheduler: Can manage and view campaigns, bookings, creatives, devices and tags, and can view loop policies, player window presets, and product categories.
- User Manager: Has access to users and role management only.
- View Only: Can view all areas except billing (no access to editing).
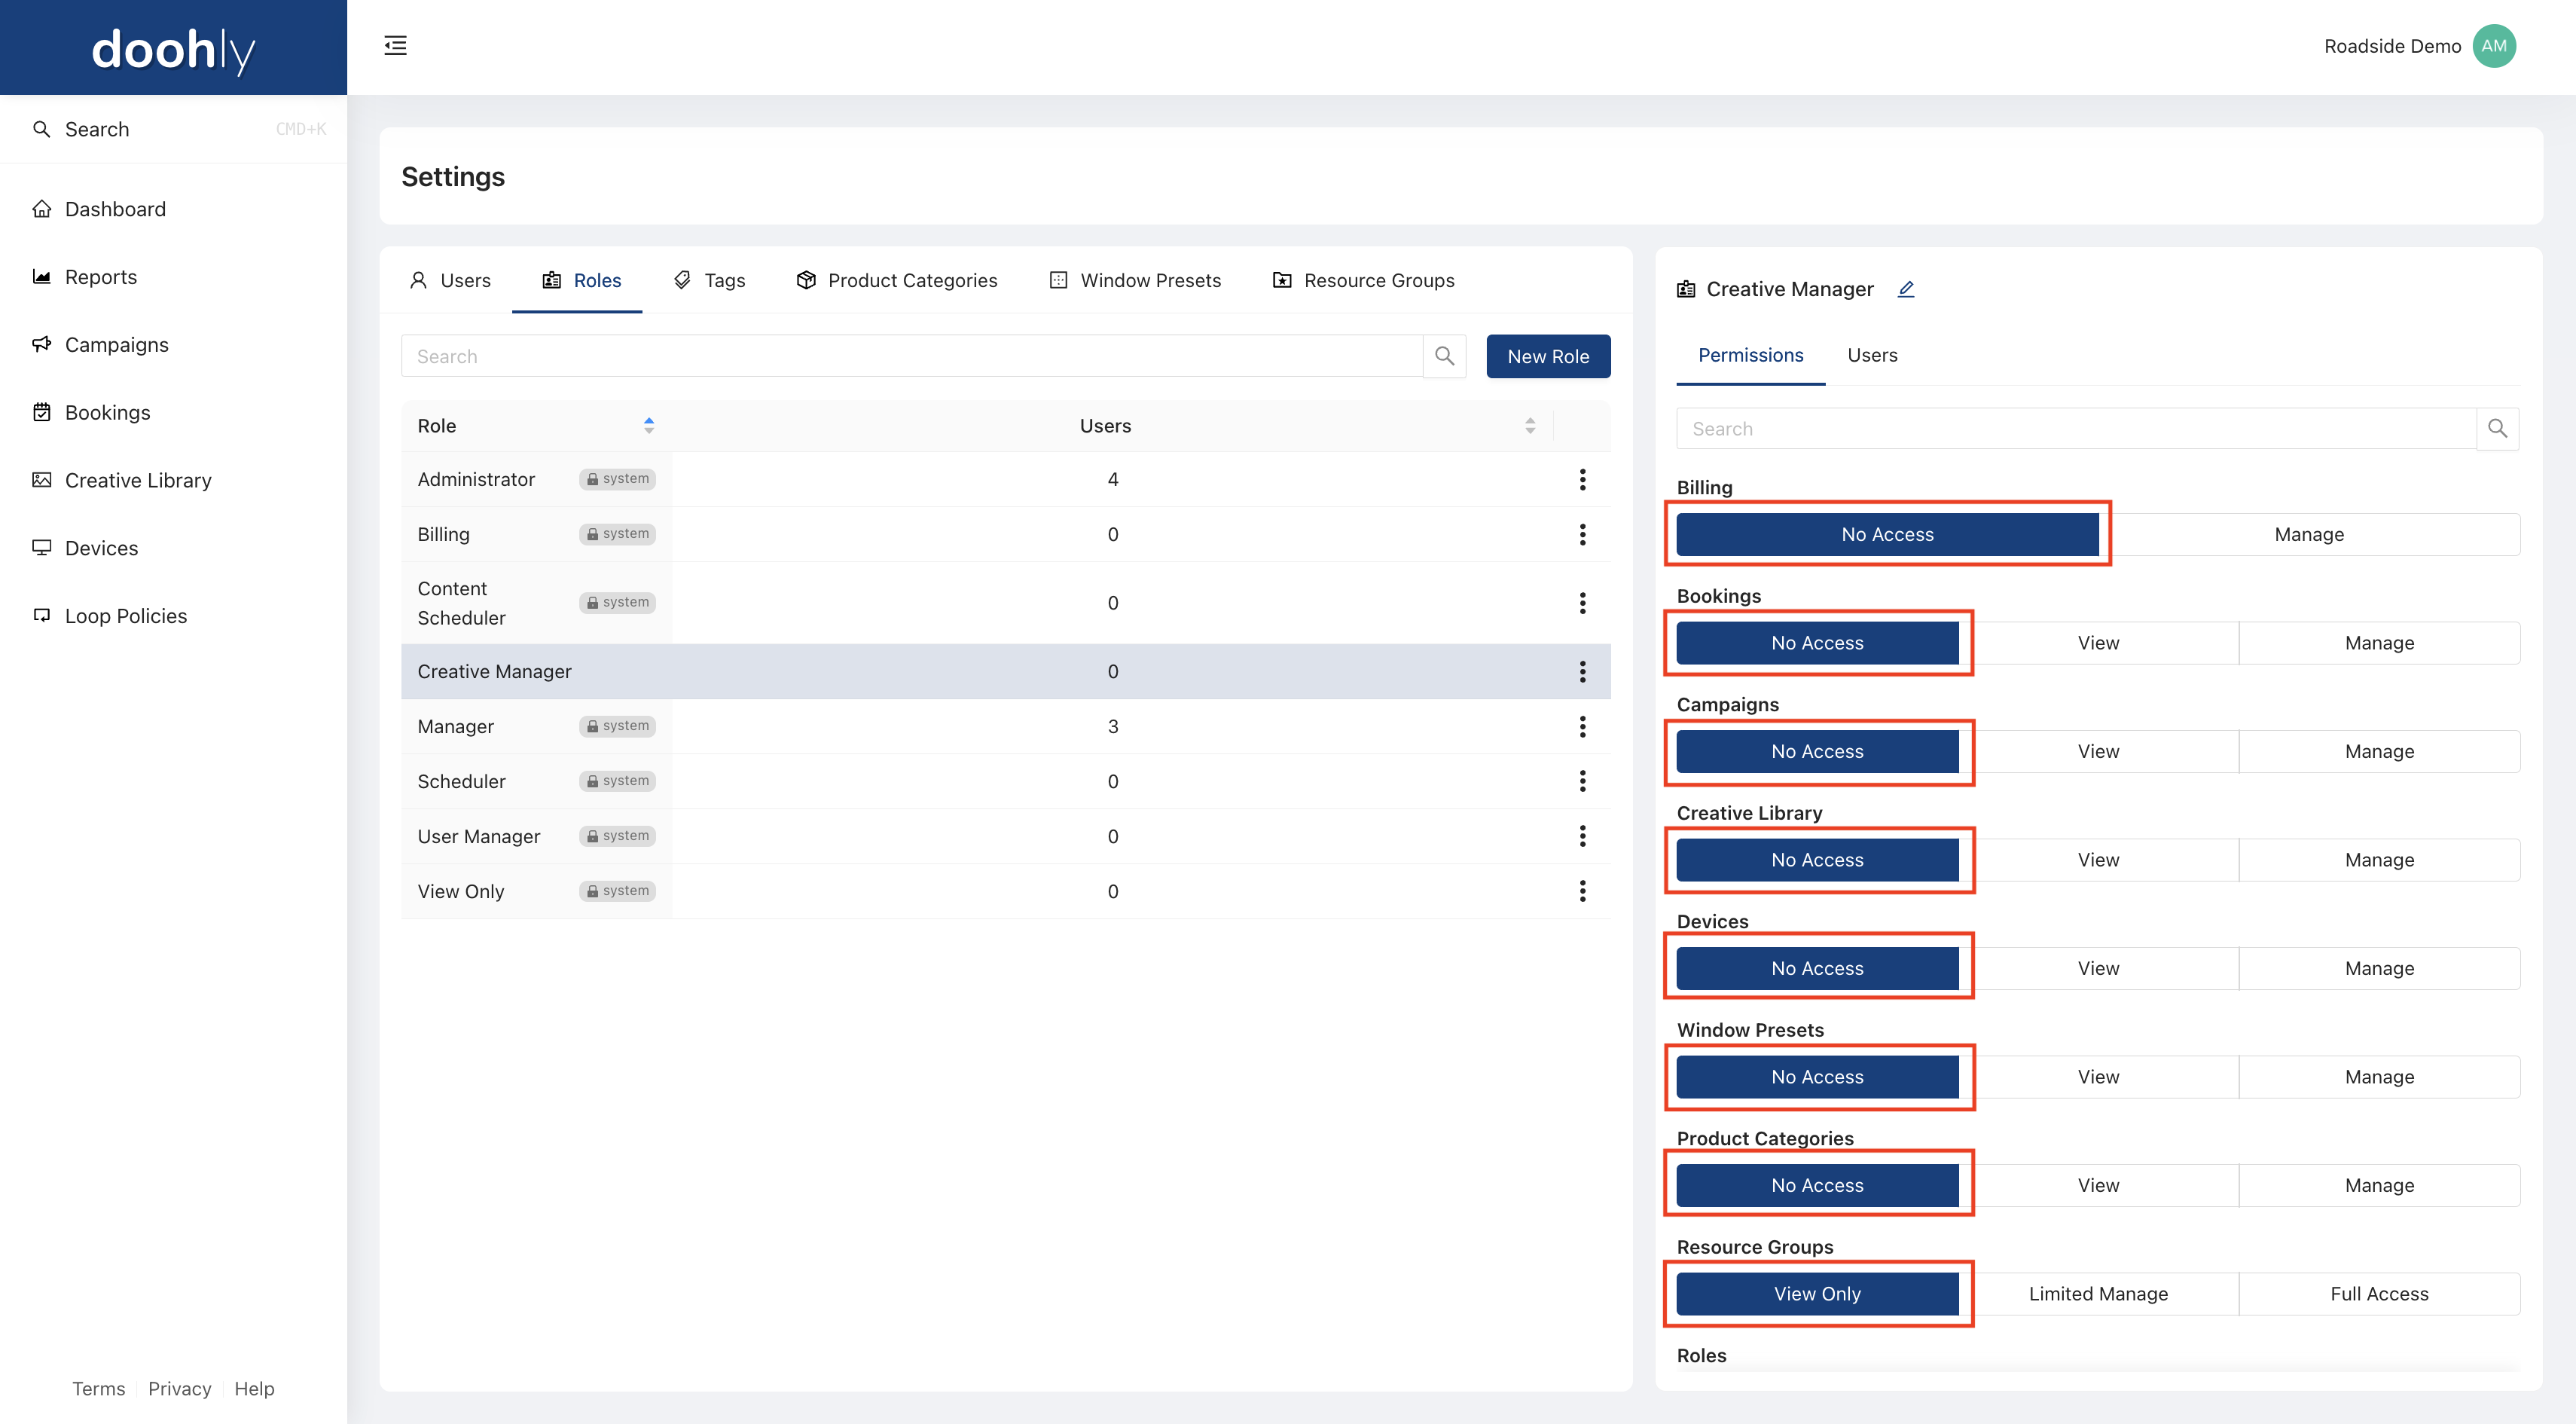
Permissions
- Each role, whether system created or created by a user, is scoped by permissions.
- By clicking on a role, you can see the permissions allocated to each role on the right side of your window.
Permission Levels:
- No Access: Users have no visibility or access to these resources.
- View: Users can only view resources.
- Manage: Users have full control all functions within a resource.
Permissions:
Specified users can do the following:
- Billing: Update billing information.
- Bookings: See Booking Permissions.
- Campaigns: View, edit, create and delete campaigns.
- Creative Library: View, add and delete creative files and folders.
- Devices: View, register, edit, and deregister devices.
- Window Presets: View, create, edit and delete window presets.
- Product Categories: View, create, edit and delete product categories.
- Resource Groups: See more here information.
- Roles: Create roles and delete roles with custom permissions.
- Tags:Create, add and remove tags.
- Reports: Run inventory reporting.
Booking Permissions:
- No Access: Users have no visibility or access to these resources.
- View: Bookings can only ‘View Reports’.
- Manage:
- Manage Booking: Create, delete, and rename bookings.
- Manage Frame: Allows assigning and removing frames in bookings.
- Manage Information: Allows changing the status and purchase type and assigning bookings to campaigns.
- Manage Schedule: Allows changing the booking schedule.
- Manage Creatives: Allows adding and removing creatives and setting creative weighting in bookings.
- Manage Creative Duration: Allows changing creative durations in bookings.
- Manage Playback Frequency: Allows changing the playback frequency.
- Manage Tags: Allows adding and removing tags from bookings.
- View Reports: Allows viewing the reporting tab in bookings.
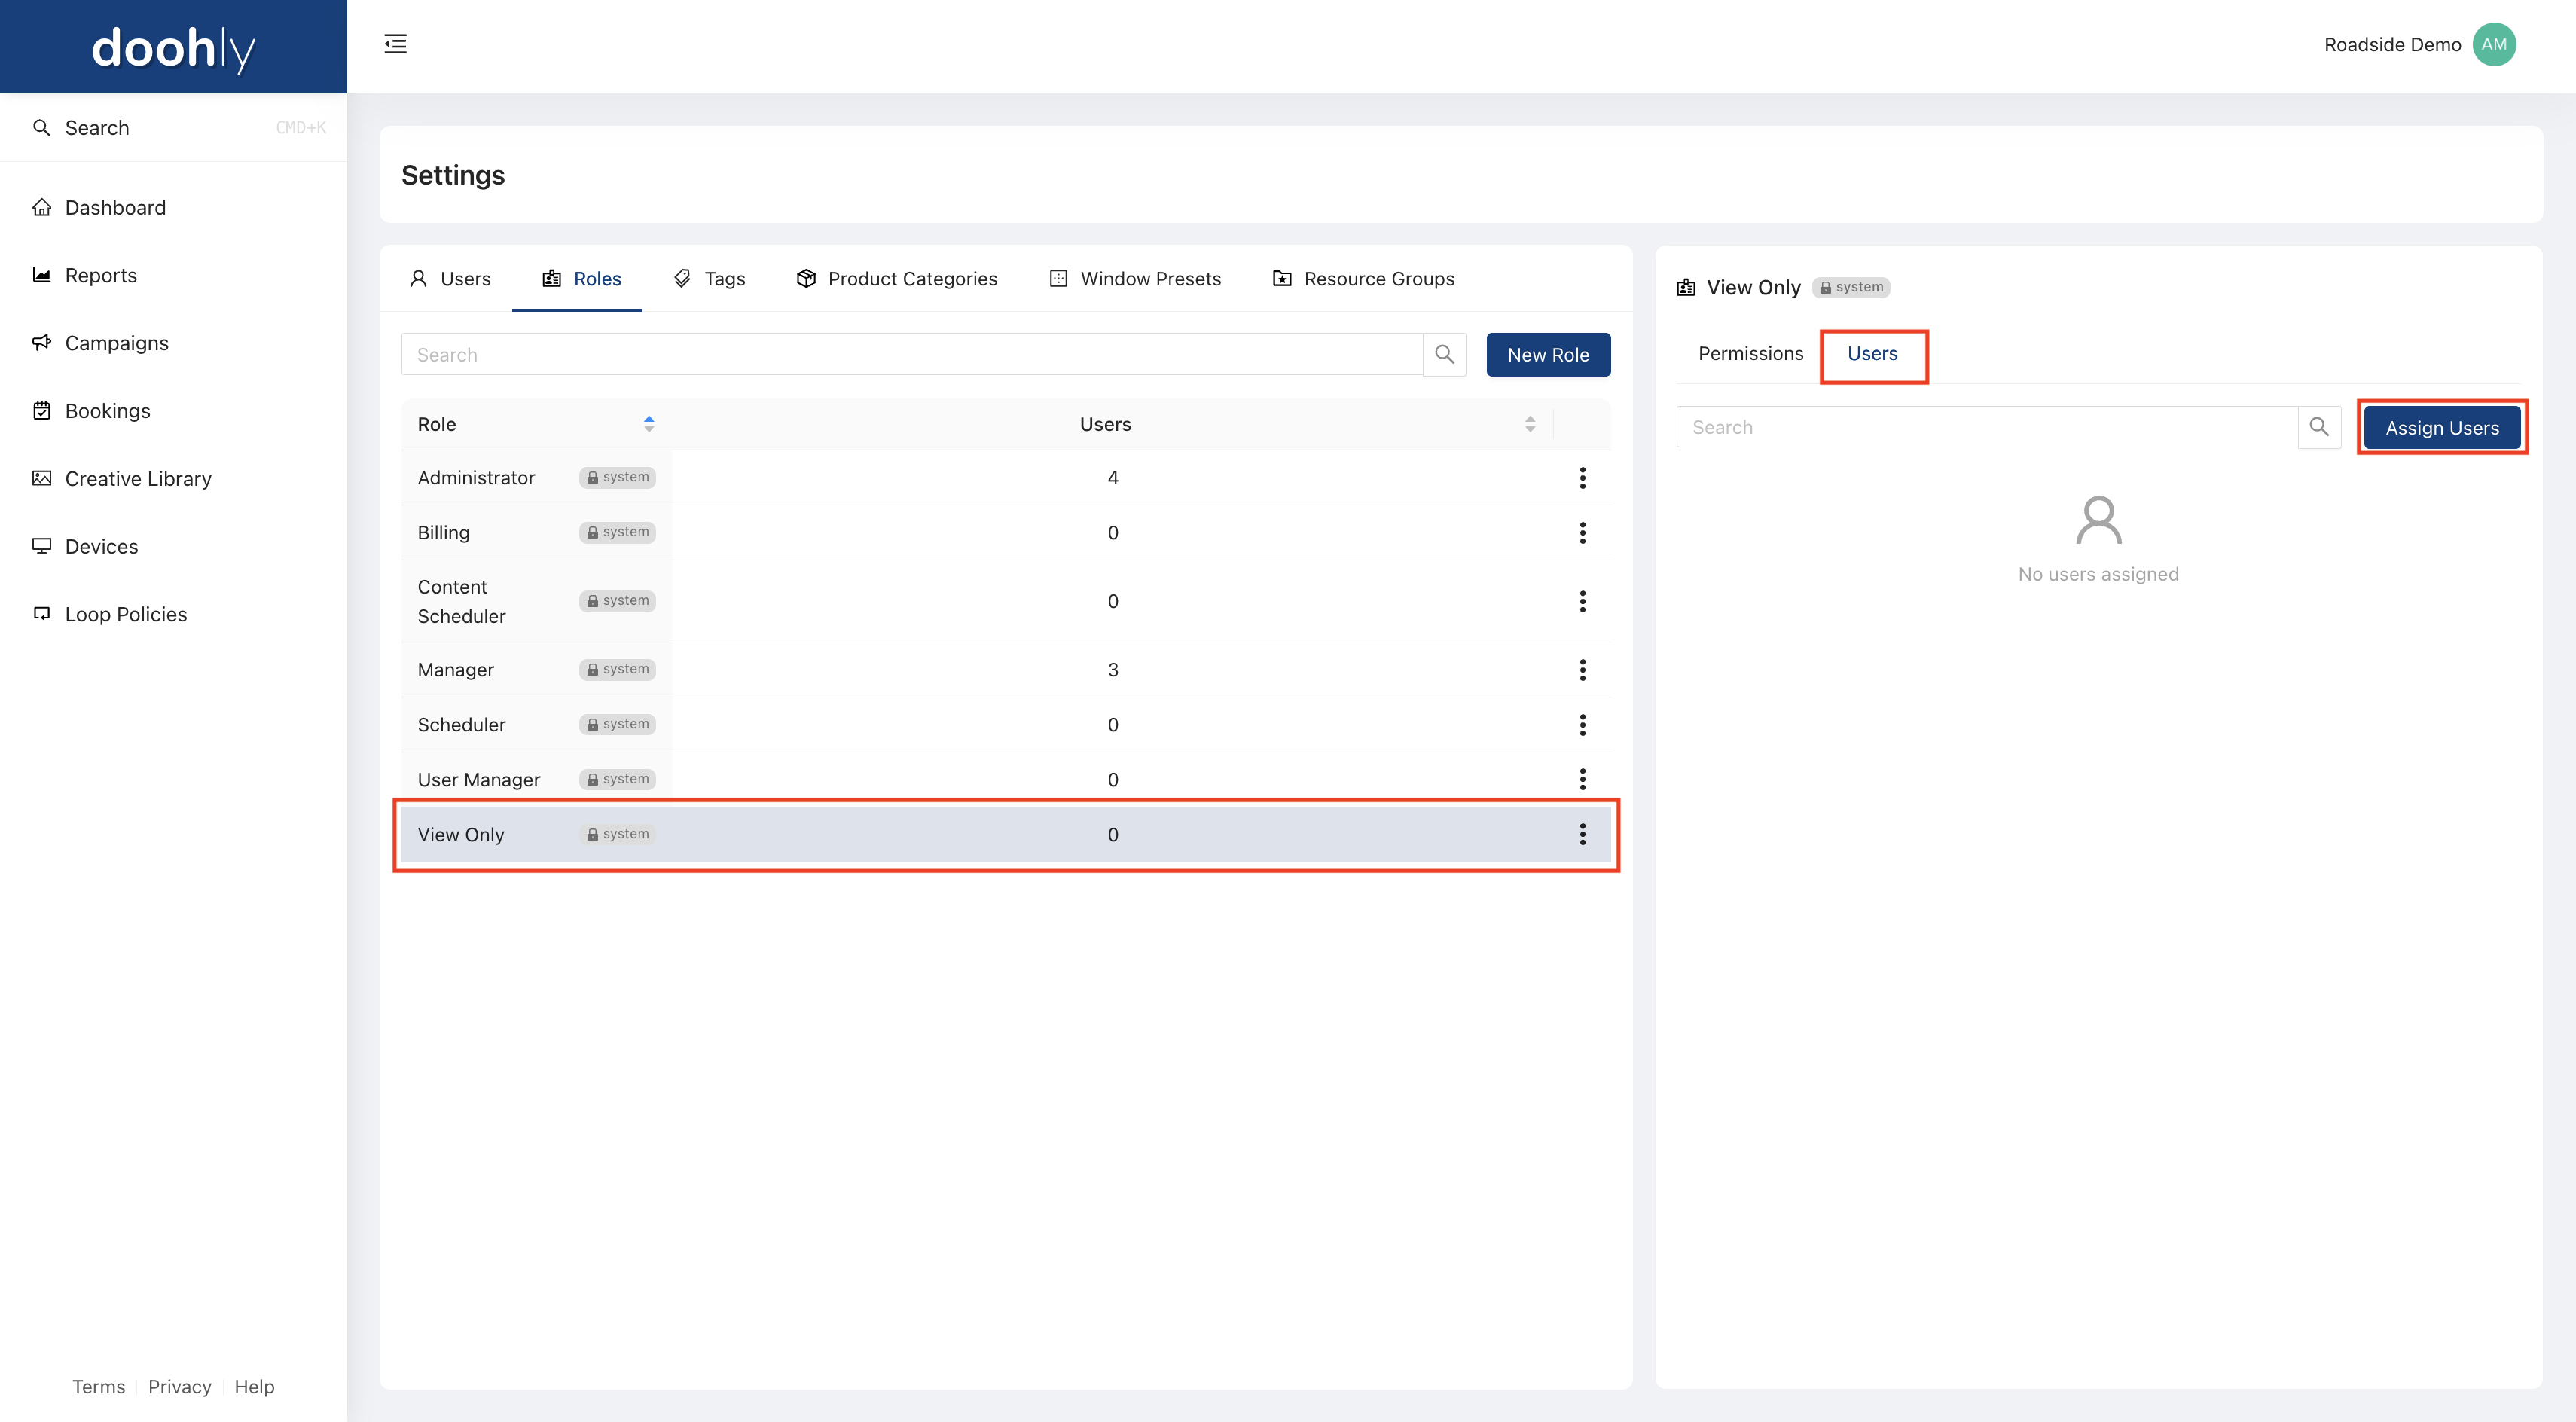
Assigning Users To A Role
Users can be assigned to both the system roles and user-created custom roles.
- Within Settings, go to Roles and navigate to the specific role you would like to assign a user to.
- Click Users in the role details menu.
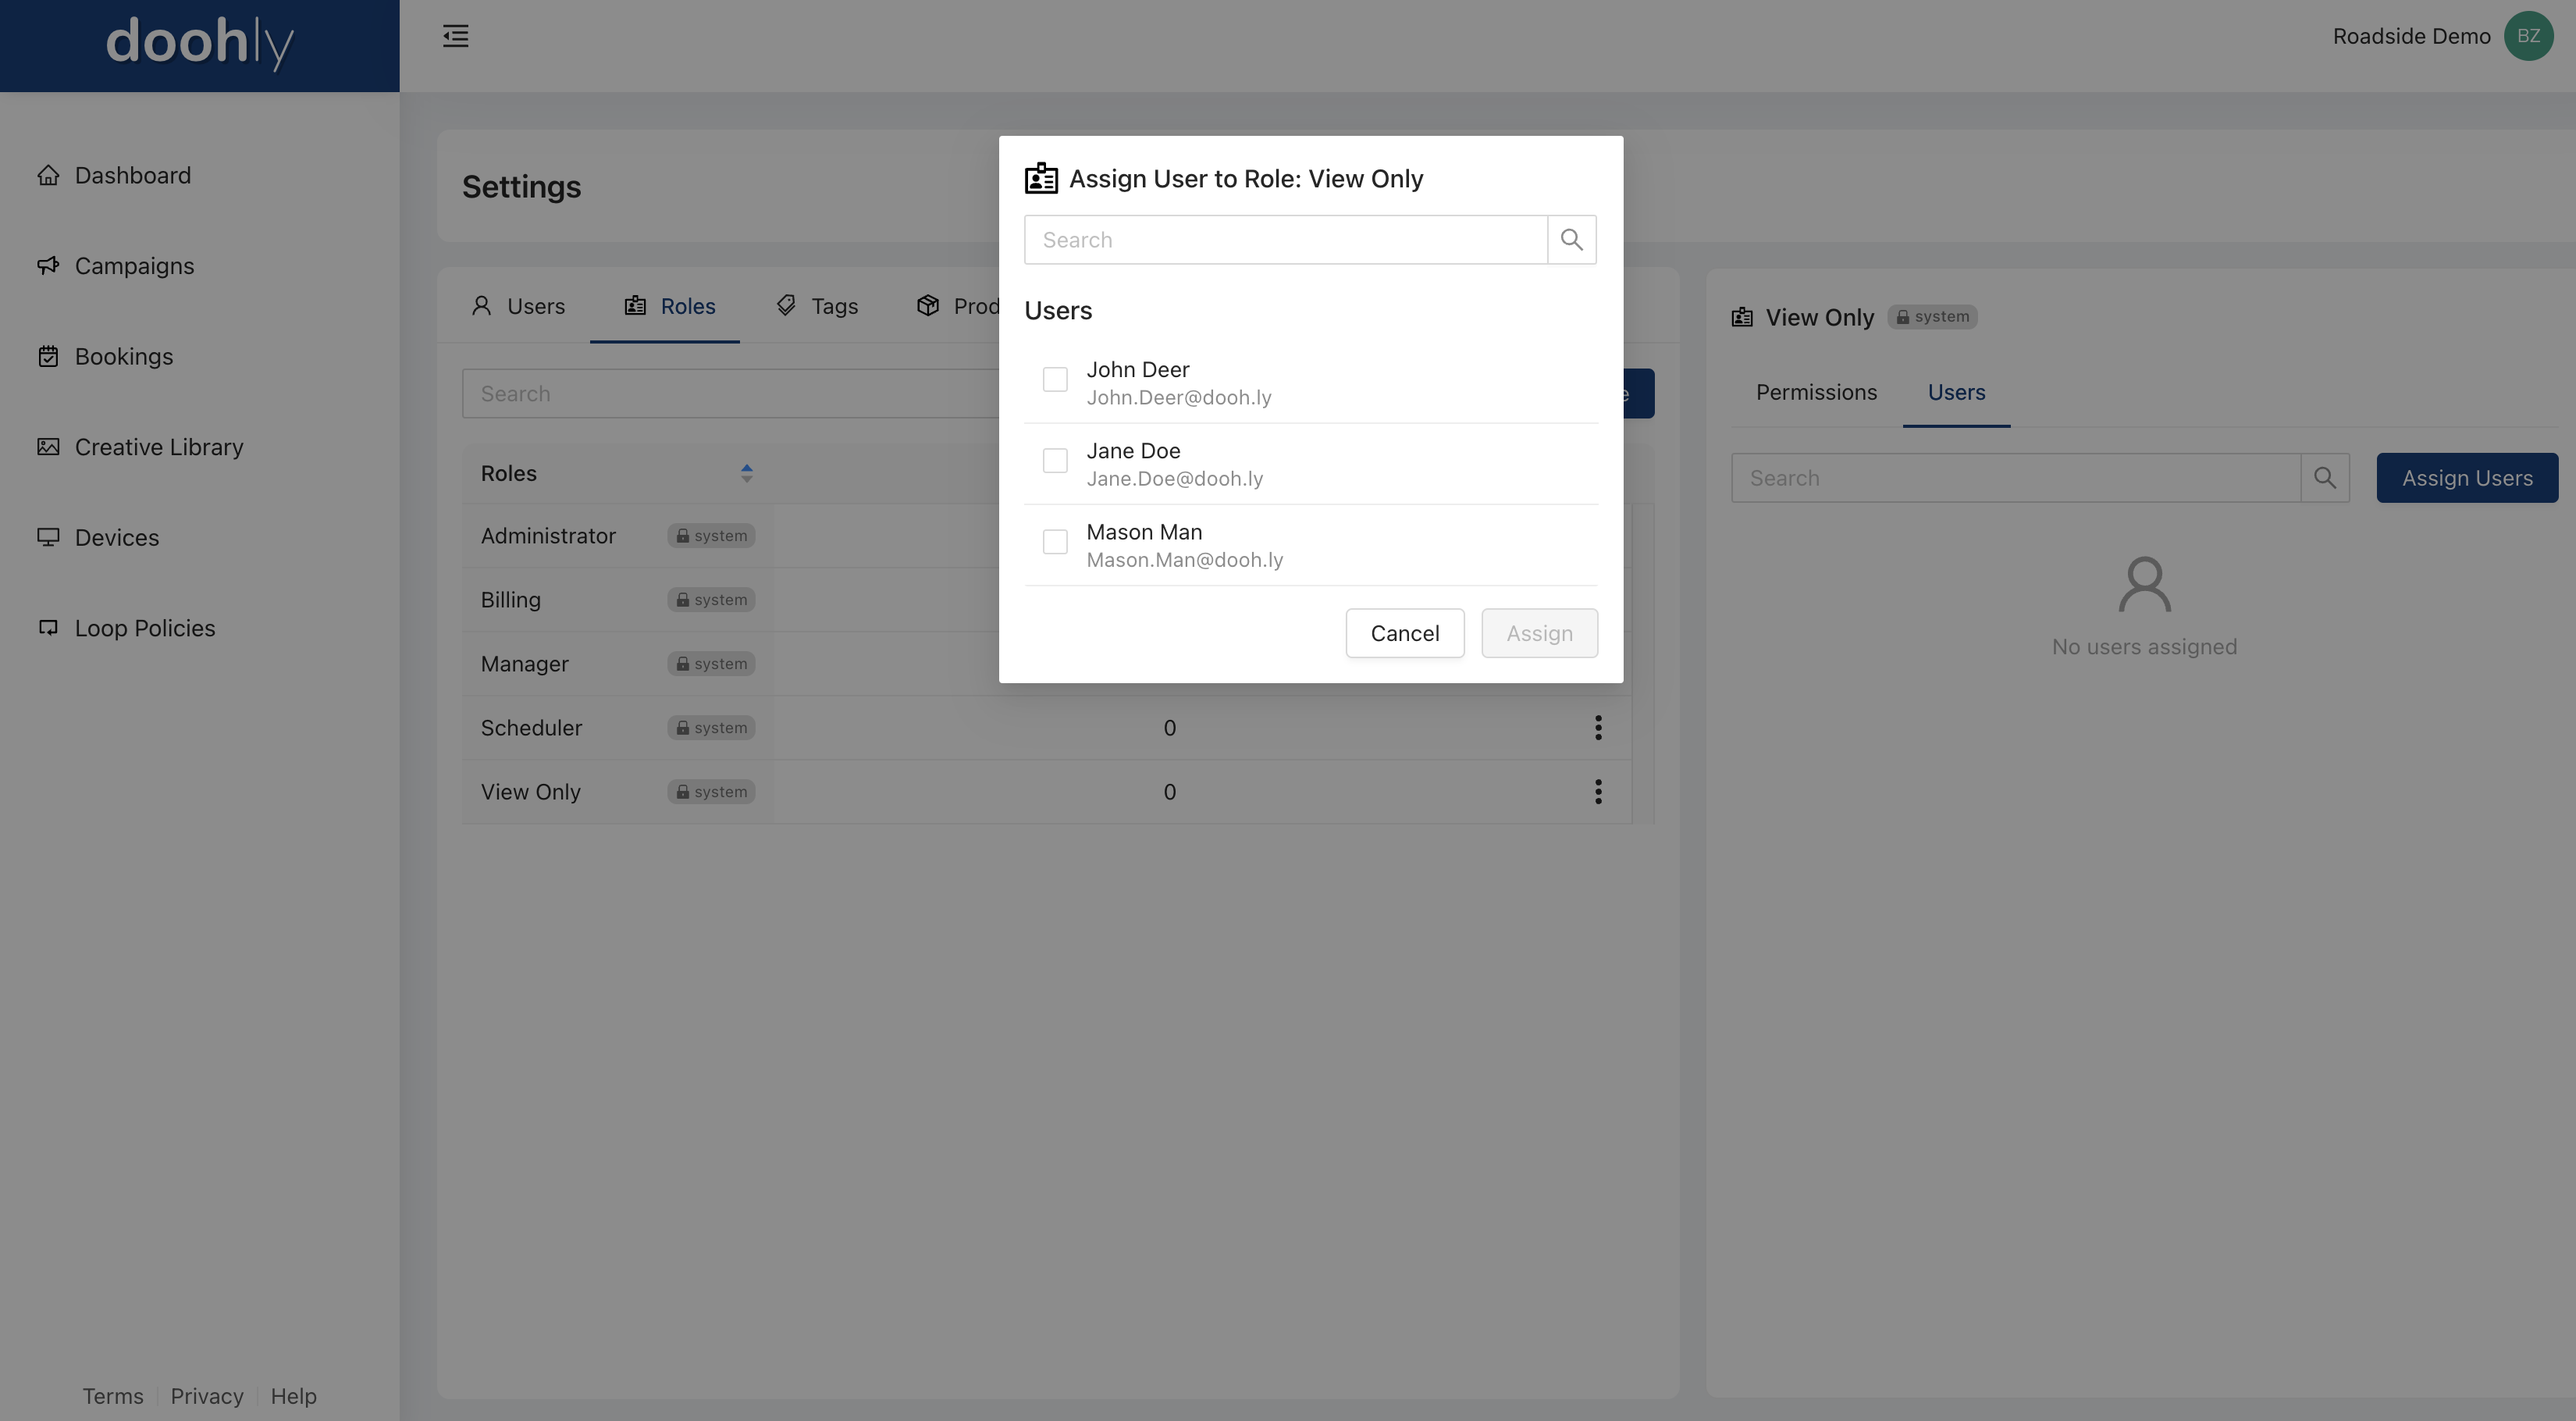
- Click Assign Users.
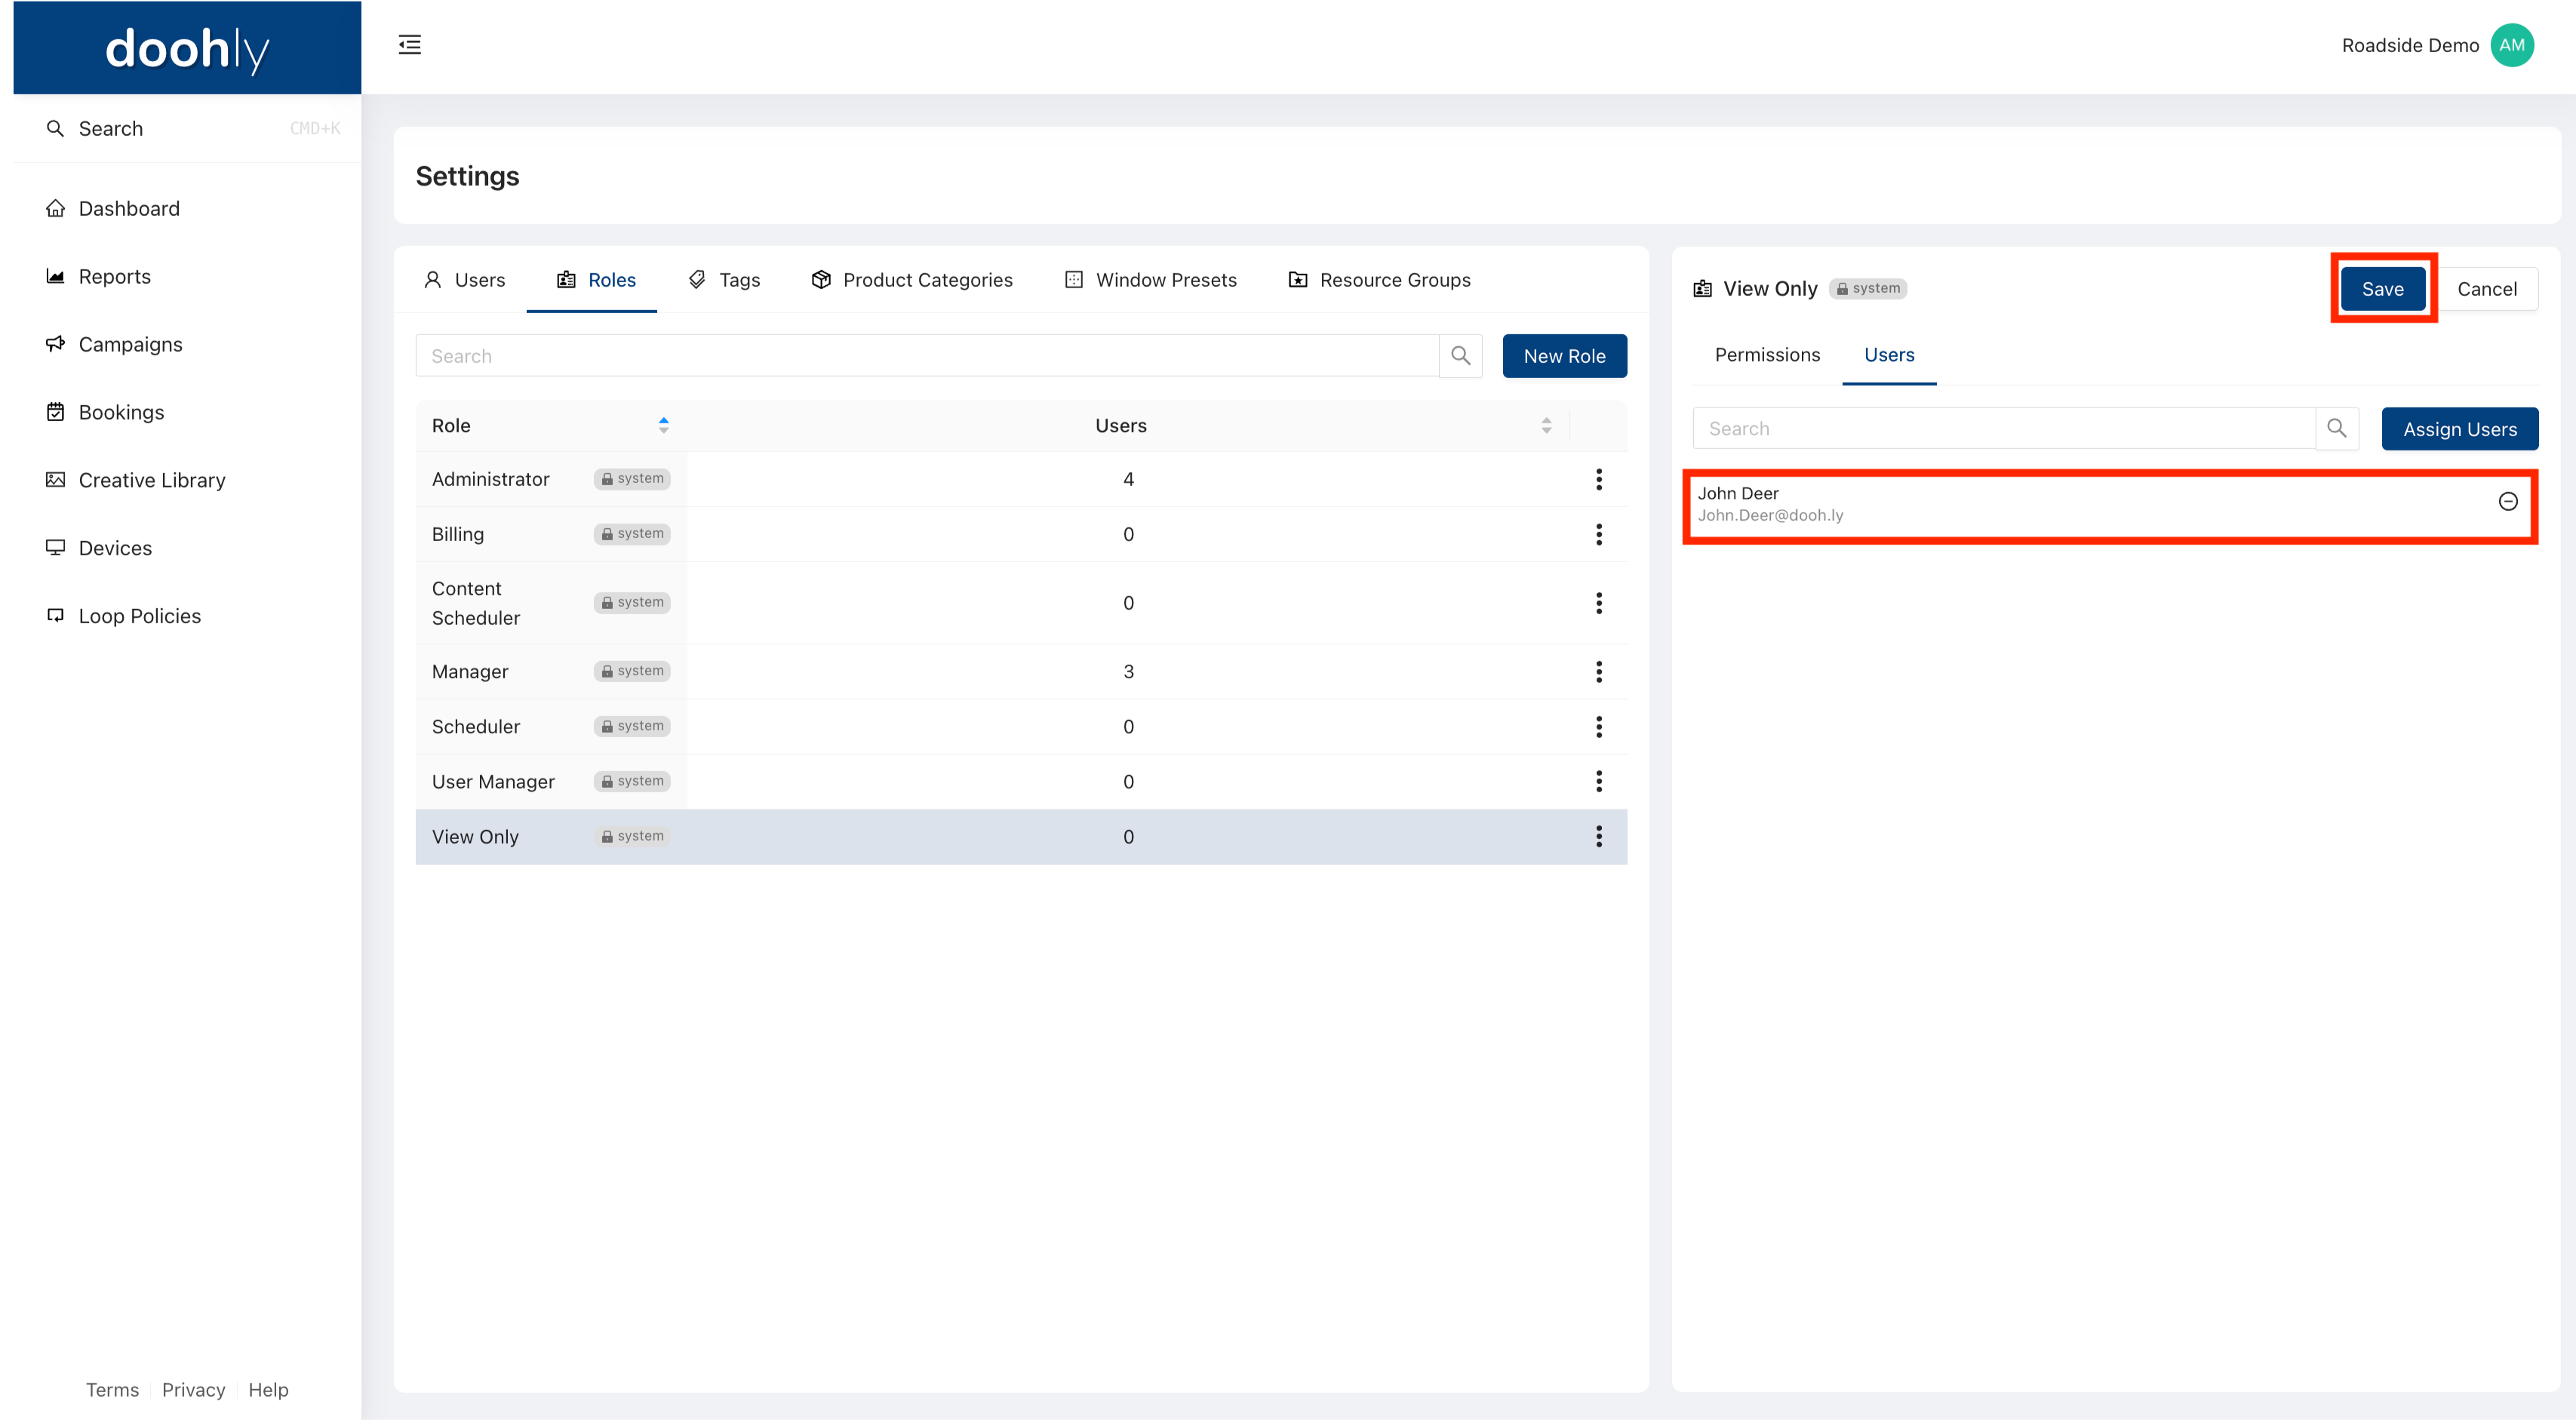
- A list of all users in the space will appear, select the users you wish to assign this role to and click Assign.
- Save the changes to apply them.
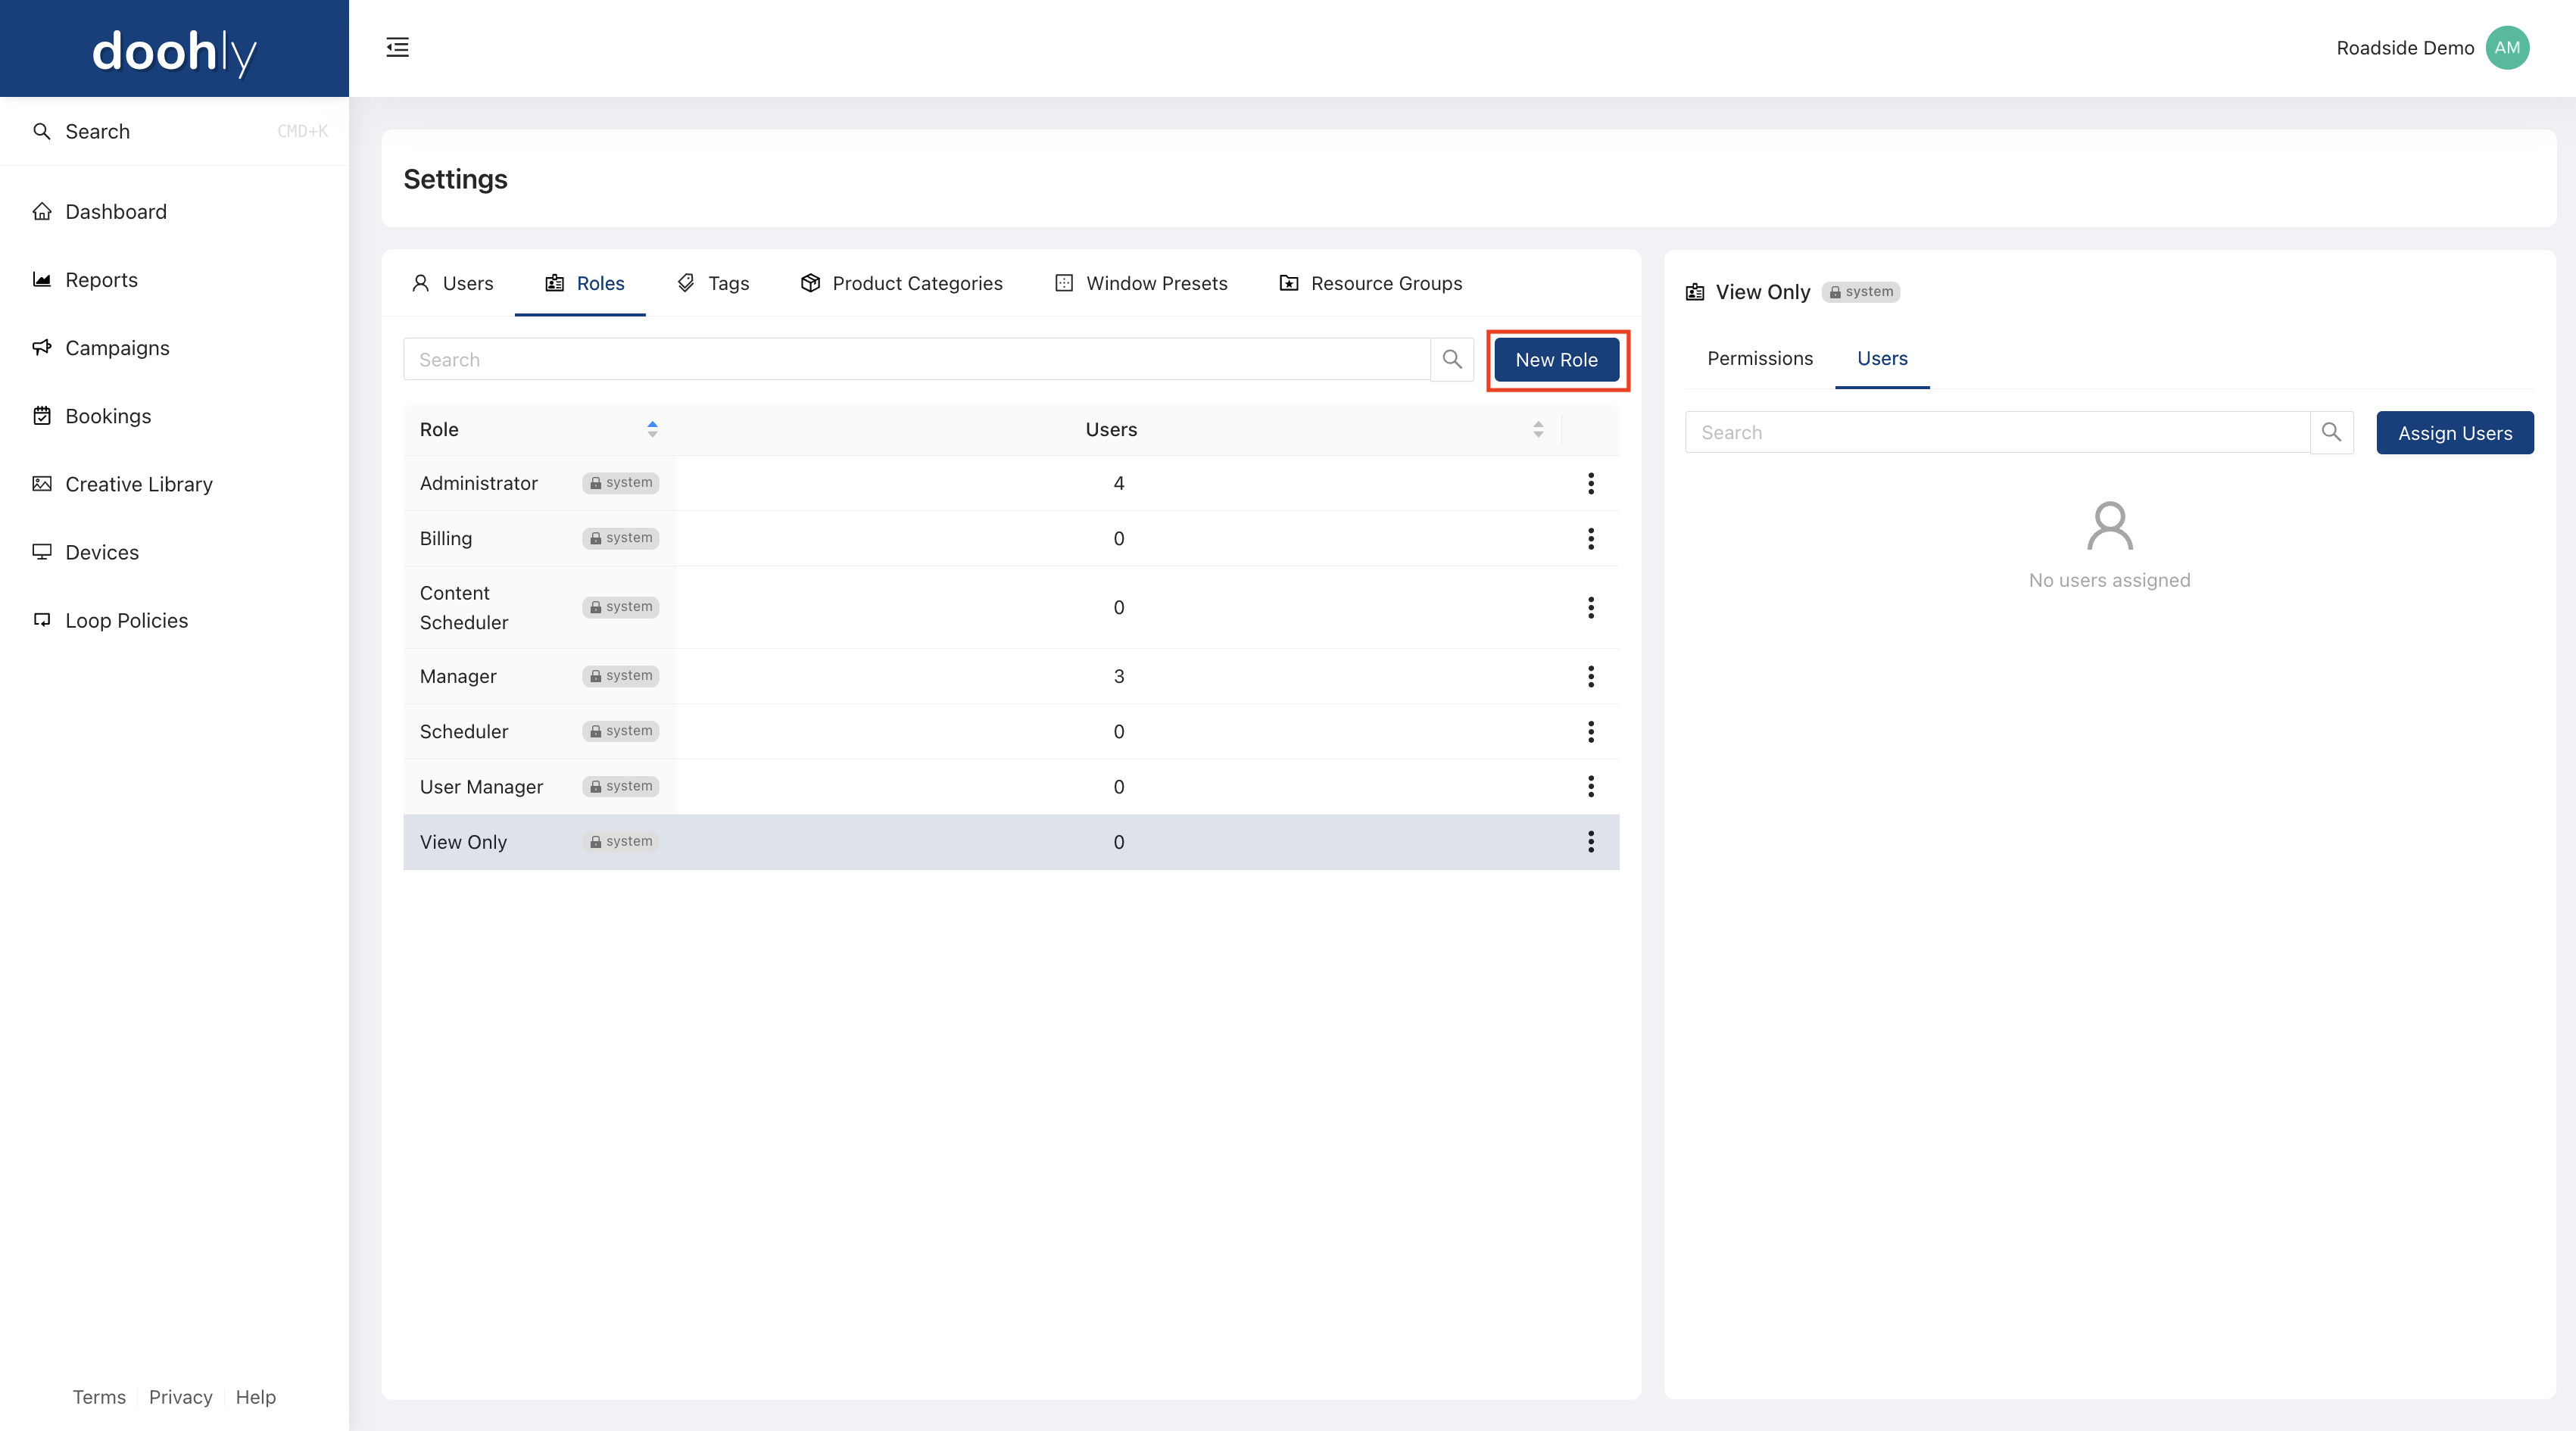
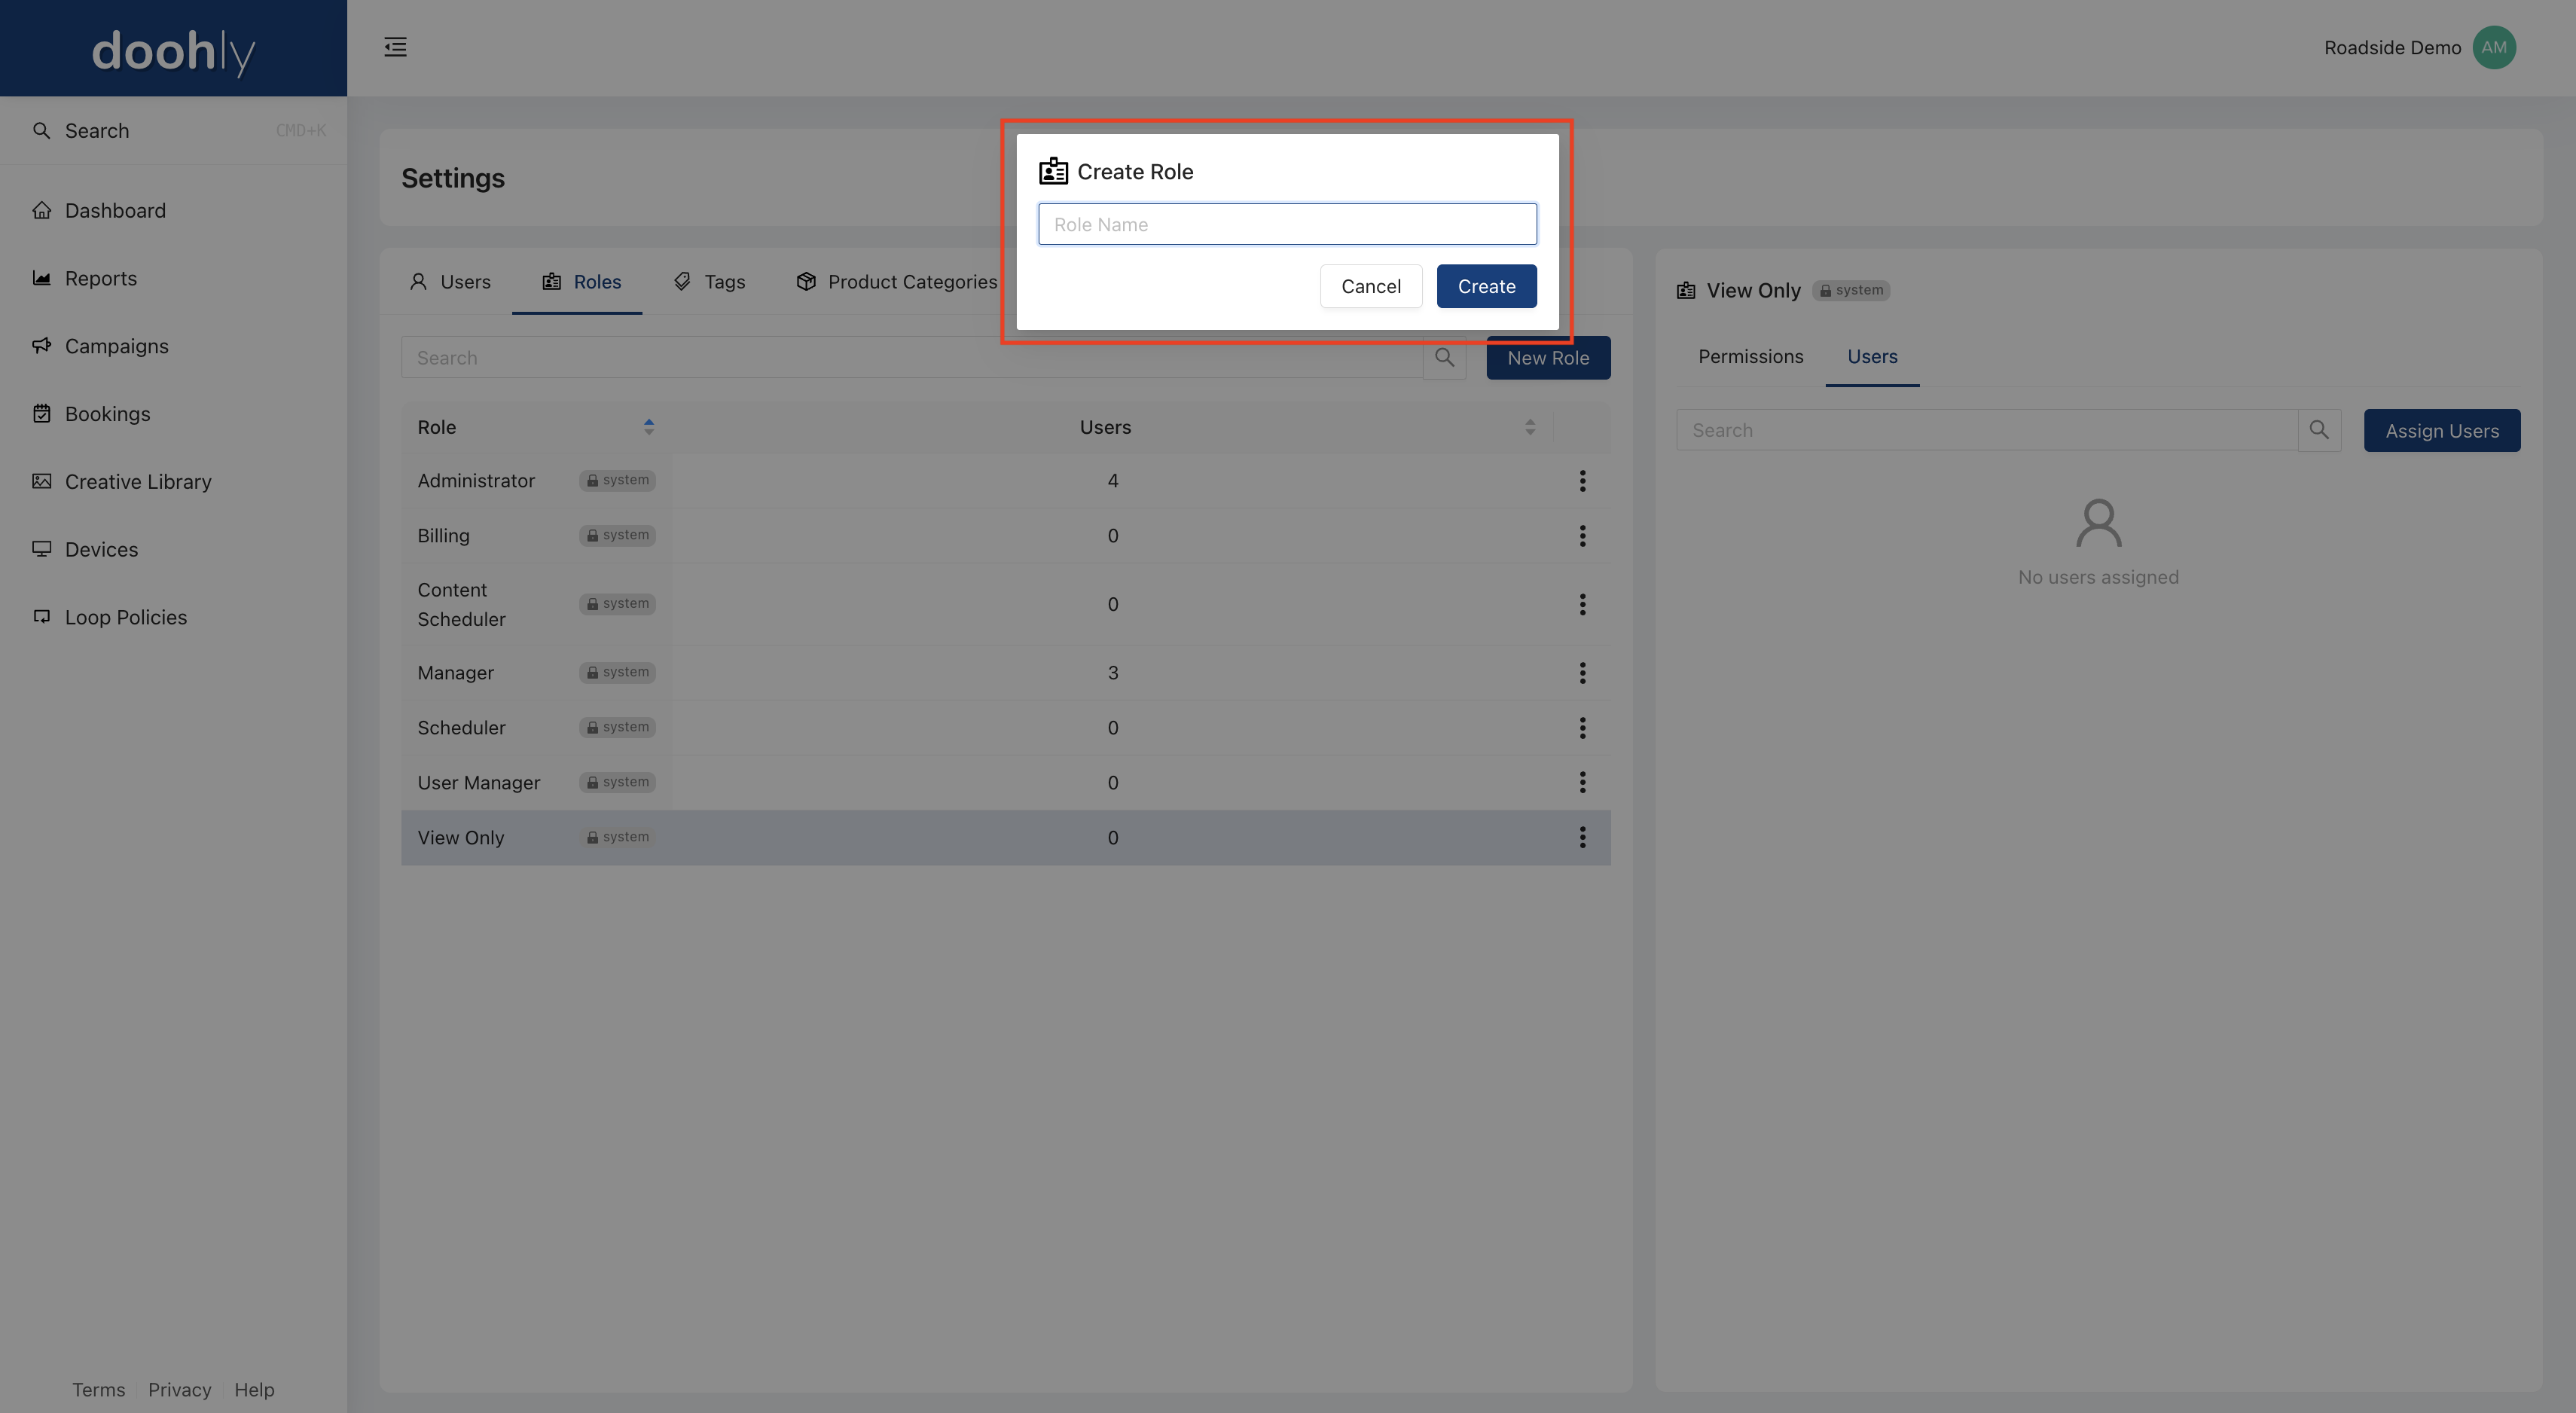
Creating A New Role
Unique custom roles can be created and assigned to users to suit your needs.
To create and assign a new custom role:
- Go to Settings.
- Click on the Roles tab.
- Click New Role, and give it a relevant name.
- Configure the permissions on the right-hand side. By default, permissions will be set to No Access.
- Once the permissions have been set, navigate to Users and click on the Assign Users button; this will bring up a list of all users who can have this role assigned to them.
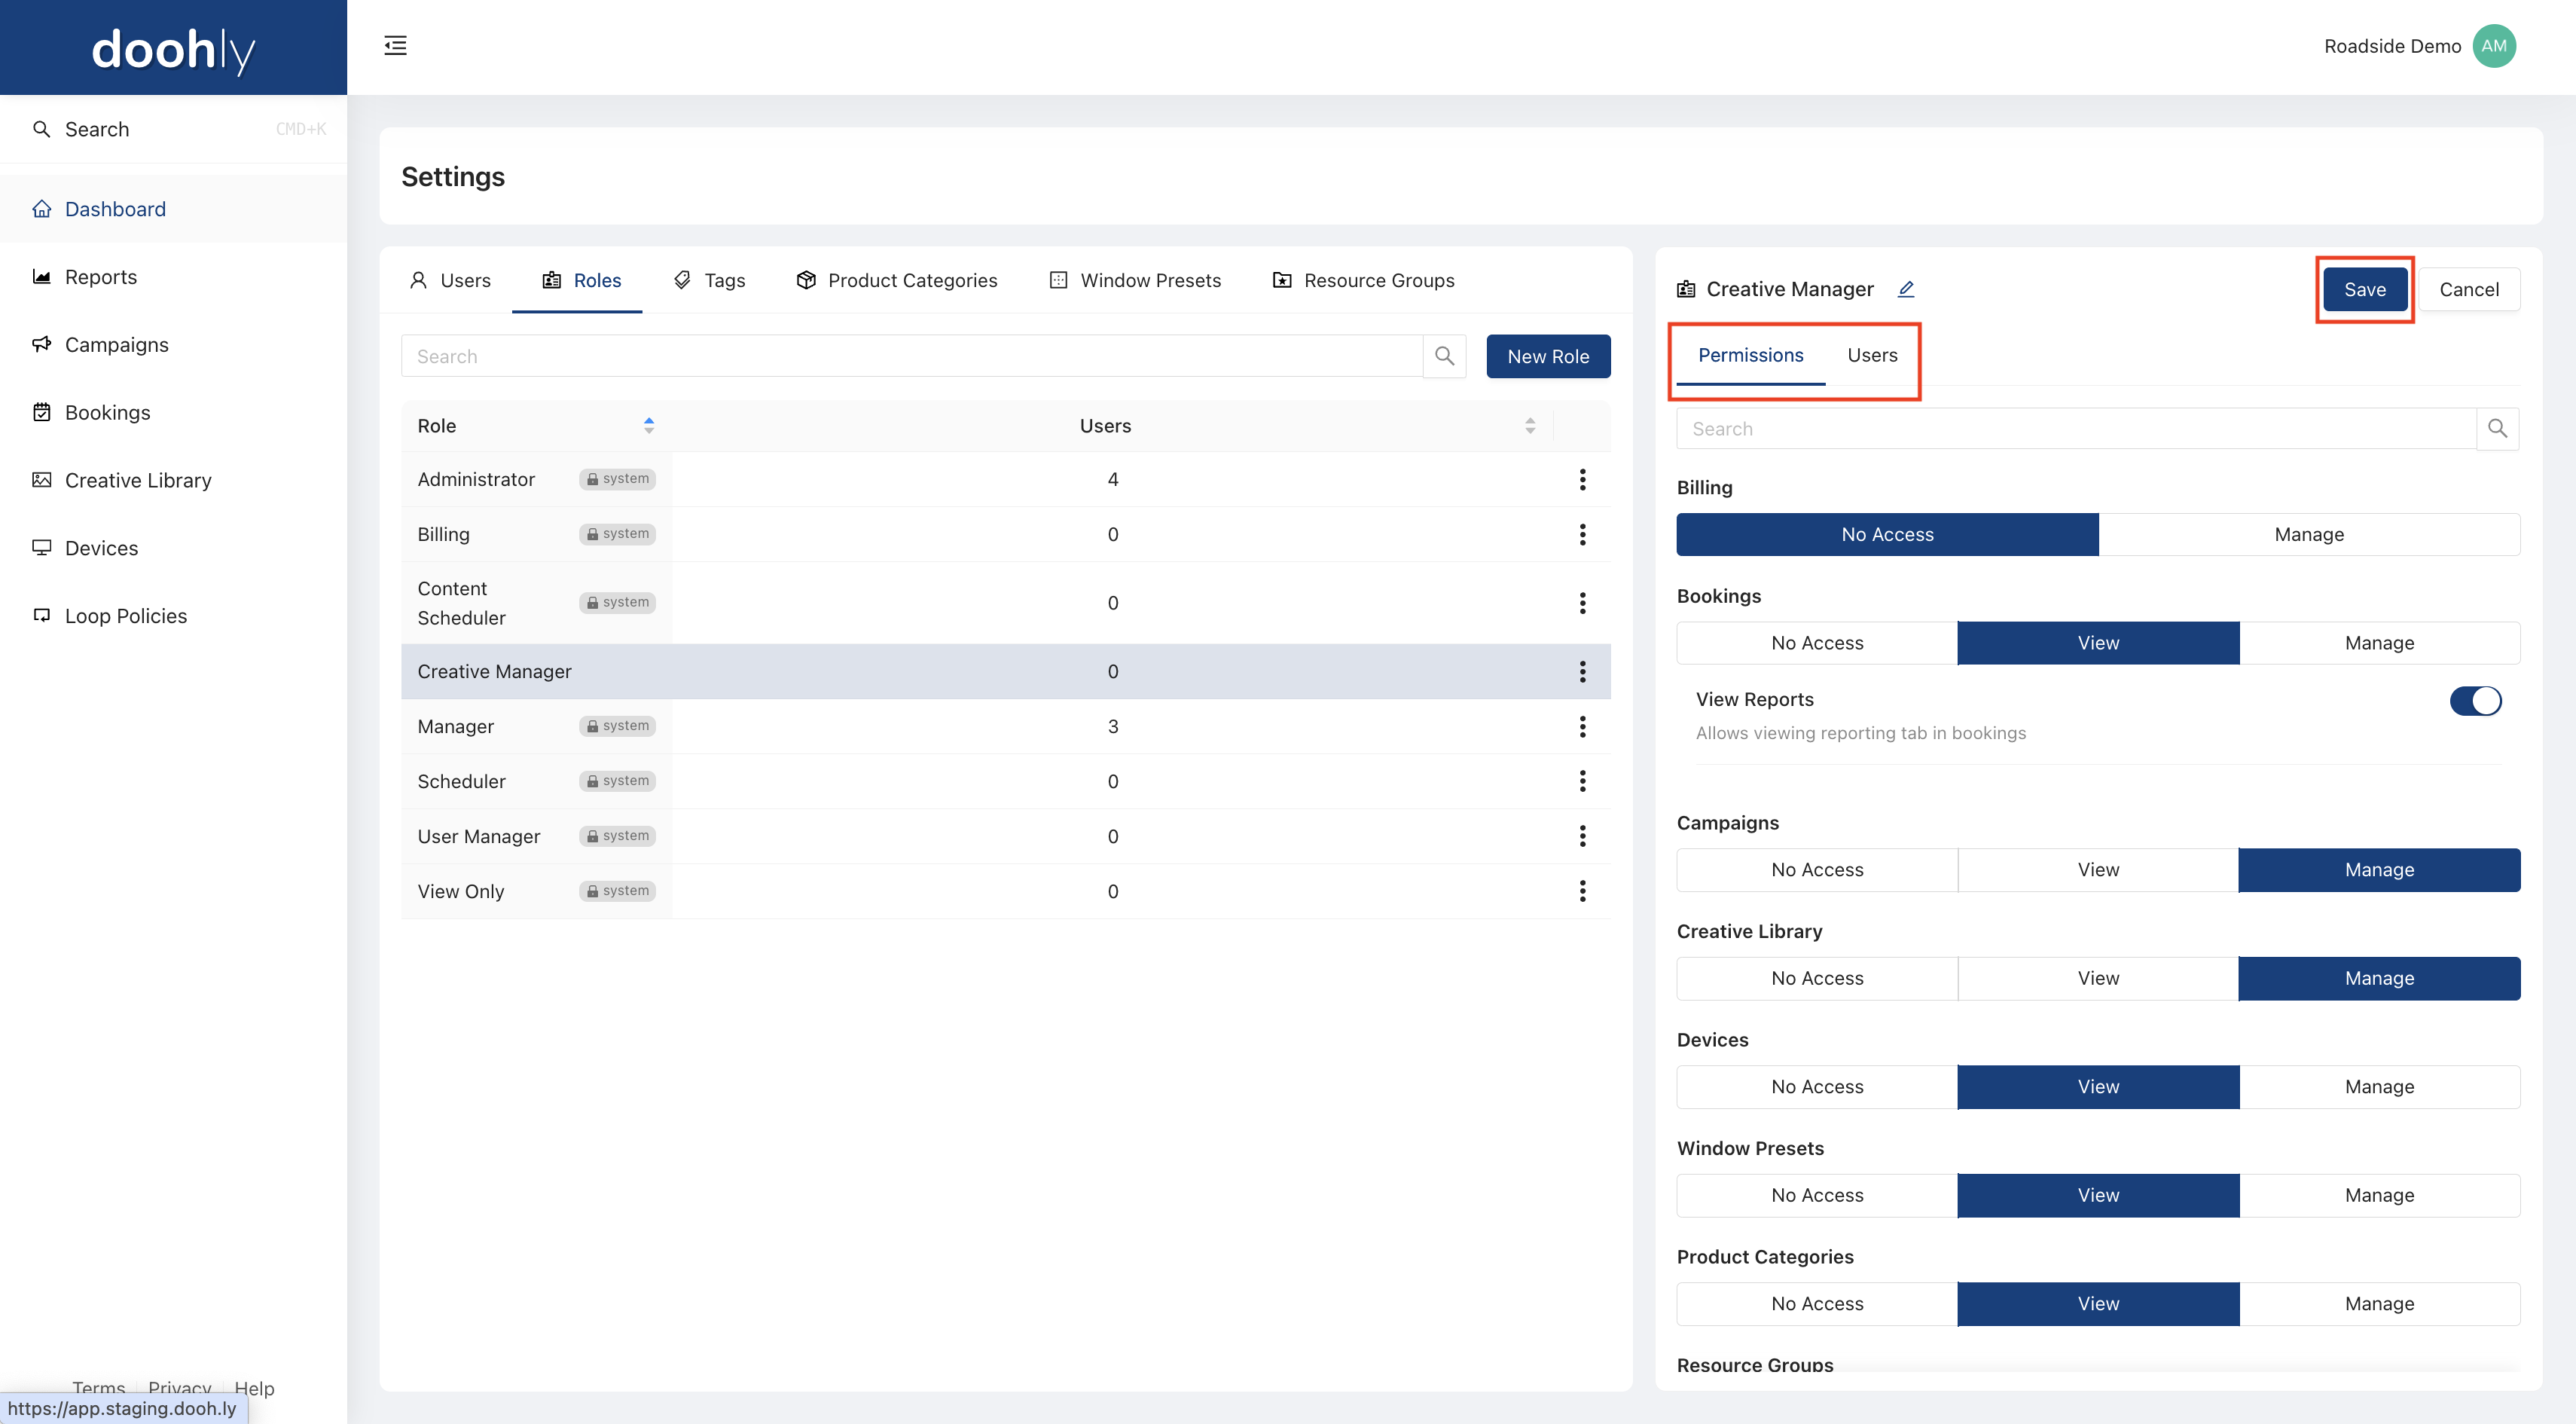
- Once all the users have been selected, be sure to click Save for changes to take effect.
Note: Custom roles can be cloned or deleted by using the menu next to their name.
If you have any questions or need assistance, please contact our Support Team: [email protected]
Updated over 1 year ago