Resource Groups
'Resource Groups' offer enhanced permission management for better control and organisation.
Overview
Resource Groups provide precise management, enhanced control, and boosted security for your resources.
They allow for meticulous resource management by ensuring only authorised individuals can view or manage specific items, such as individual devices, campaigns, creative folders, loop policies, and bookings.
Resource Groups can also be used to share resources with external users, such as customers or commercial partners, who you might grant access to uploading creative or scheduling content to authorised bookings.
Definitions
- Members: Users within a Resource Group.
- Resources: Folders and associated child folders for Devices, Campaigns, Bookings, Loop Policies, and Creative.
- Resource Group: A unique nesting of resources that a user can assign members to.
Getting Started
Enabling Resource Groups:
To enable the Resource Groups feature, please contact [email protected] for access.
Resource Group Permissions
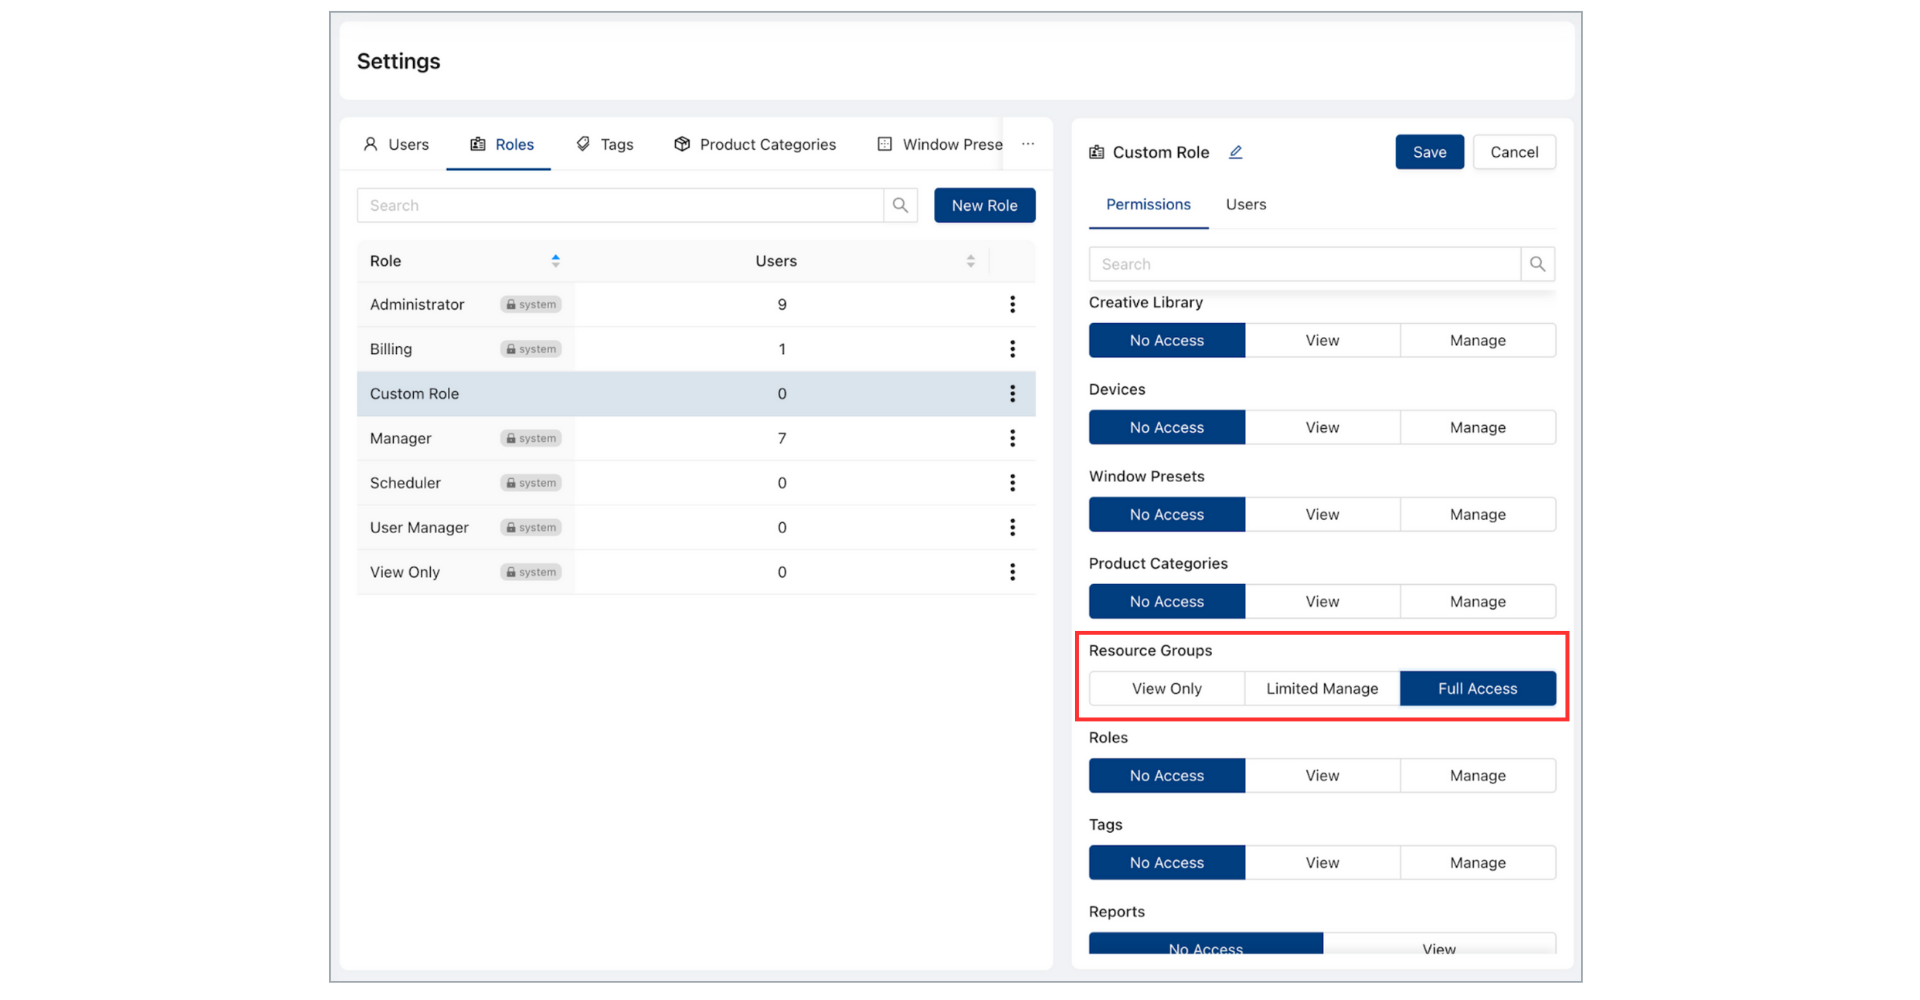
Once your organisation can access Resource Groups, users with either the ‘Administrator’ or ‘User Manager’ role have full access to edit resource groups. Custom roles can be given access to the Resource Groups with the new Resource Groups permissions under the role permissions in your Settings.
There are 3 permission levels for Resource Groups:
- View Only
- Allows the user to see which resource groups are assigned to a resource.
- Limited Manage
- Allows the user to create new resource groups and potentially edit resource groups that they are a member of. Whether the user can manage resources or members of the resource groups is determined by their resource group membership permissions. You can read more on this under “Resource Group Member Permissions”.
- Full Access
- Allows the user to create new and edit and delete any existing resource groups within the organisation.
Accessing Resource Groups
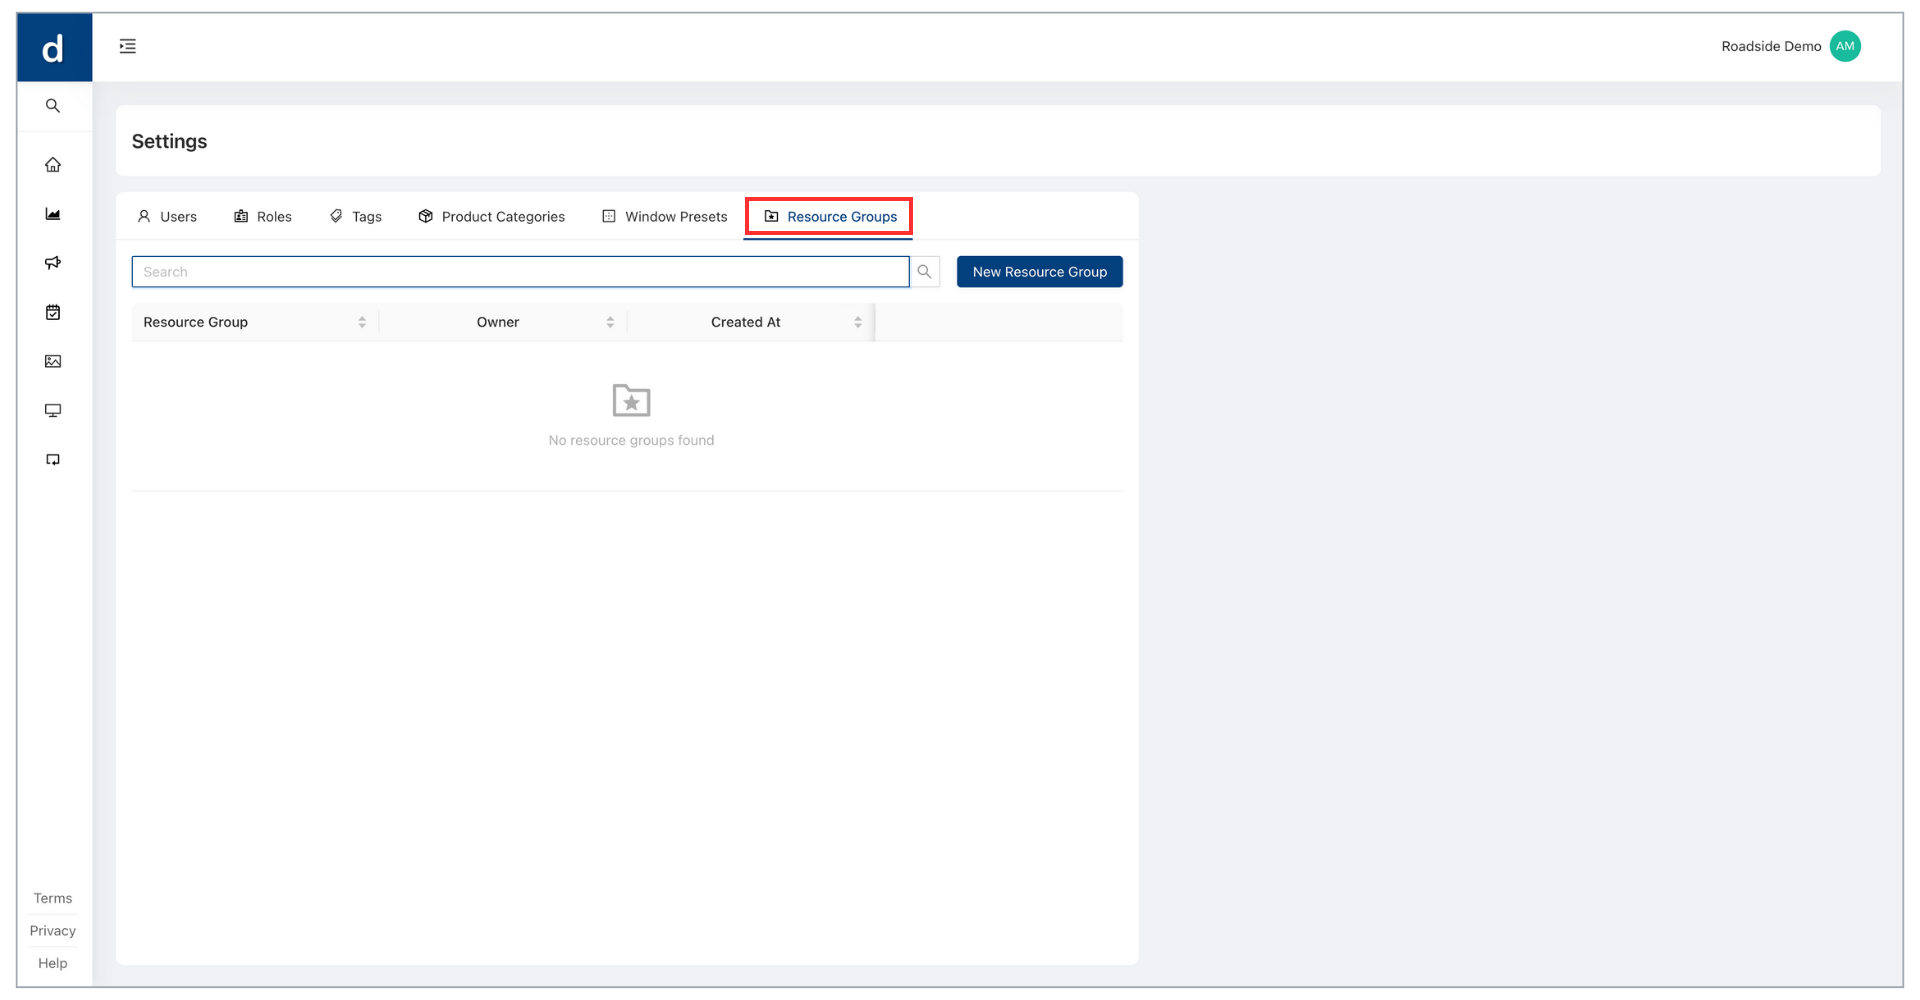
- Go to User Profile > Settings.
- On the right-hand side, click on Resource Groups.
Creating and Managing Resource Groups
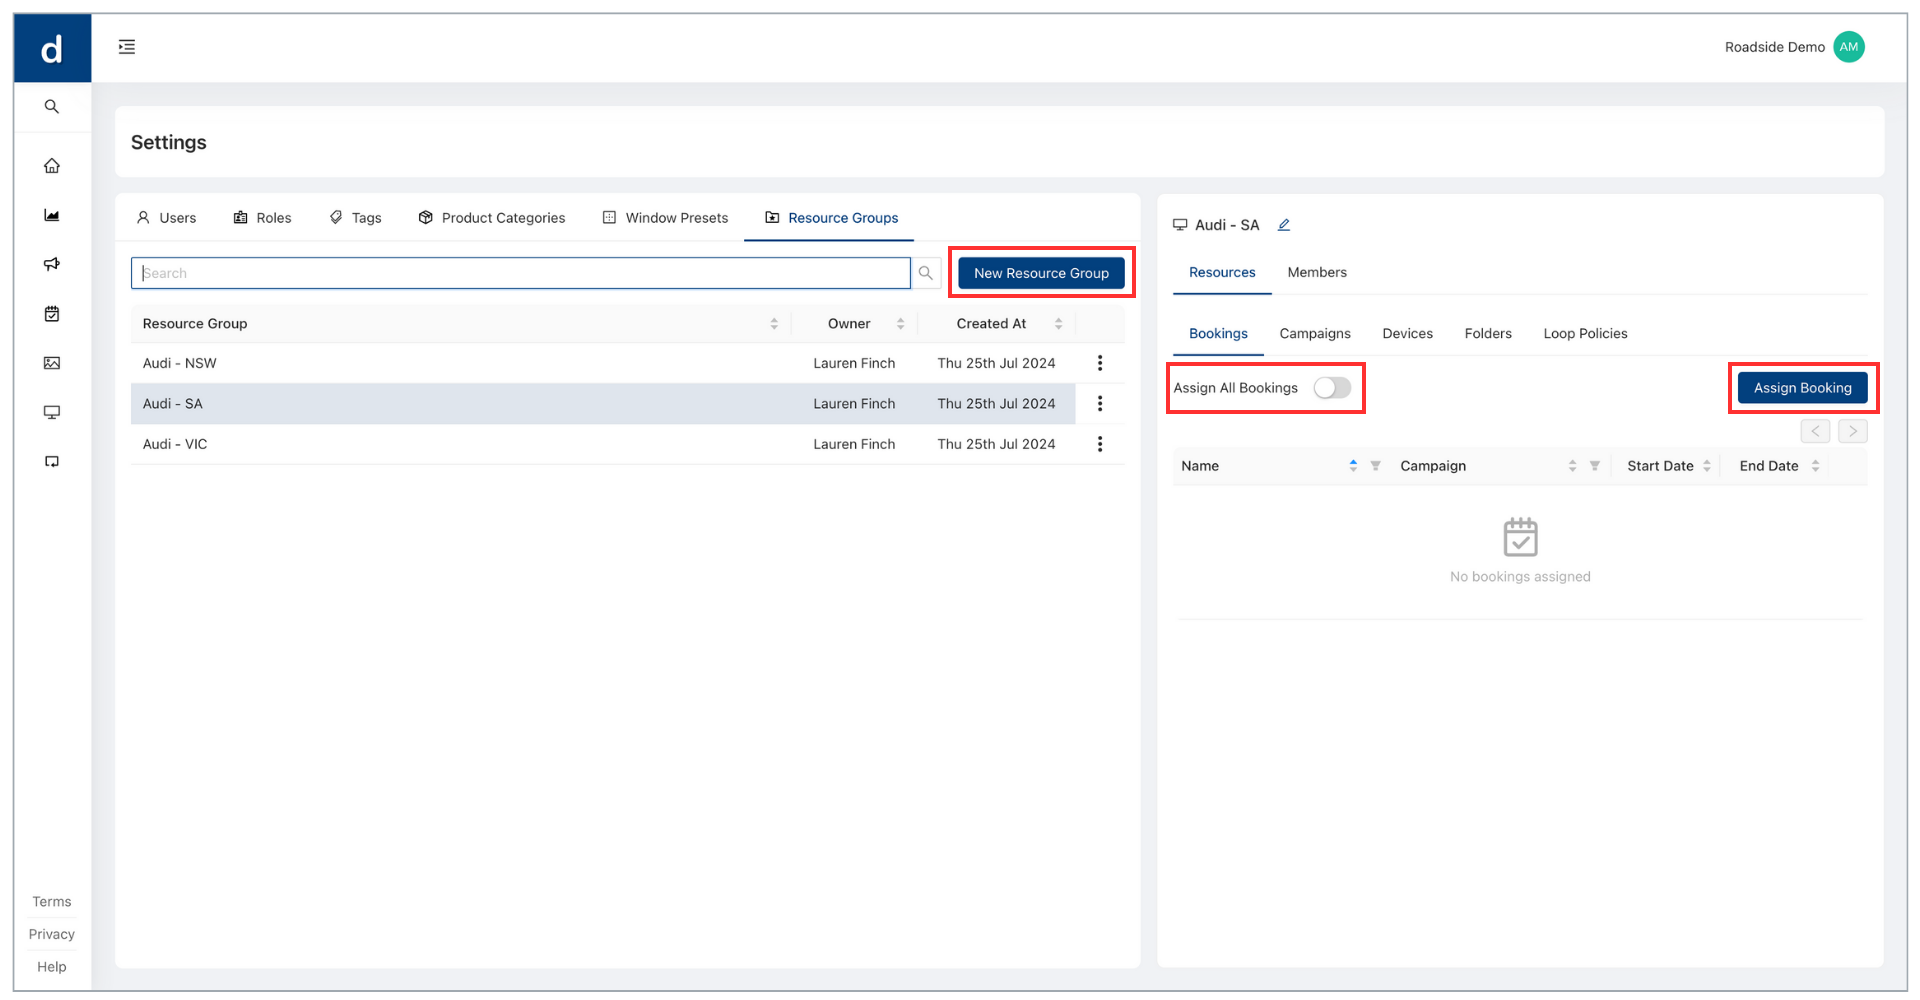
To Create a Resource Group:
- Go to Settings > Resource Groups.
- Click on New Resource Group.
- Assign a name to the Resource Group.
- Click Create.
Assigning Resources to a Resource Group:
- After creating a Resource Group, you can add resources and members.
- Select the relevant resource(s) you want to share.
- You can select 'Assign All' or select the relevant resources individually.
Note: ‘Assign All’ will include all current and future resources of that type. For example, ‘Campaigns’ will include all current and new campaigns.
Resource Types Include:
Resource Group Member Permissions
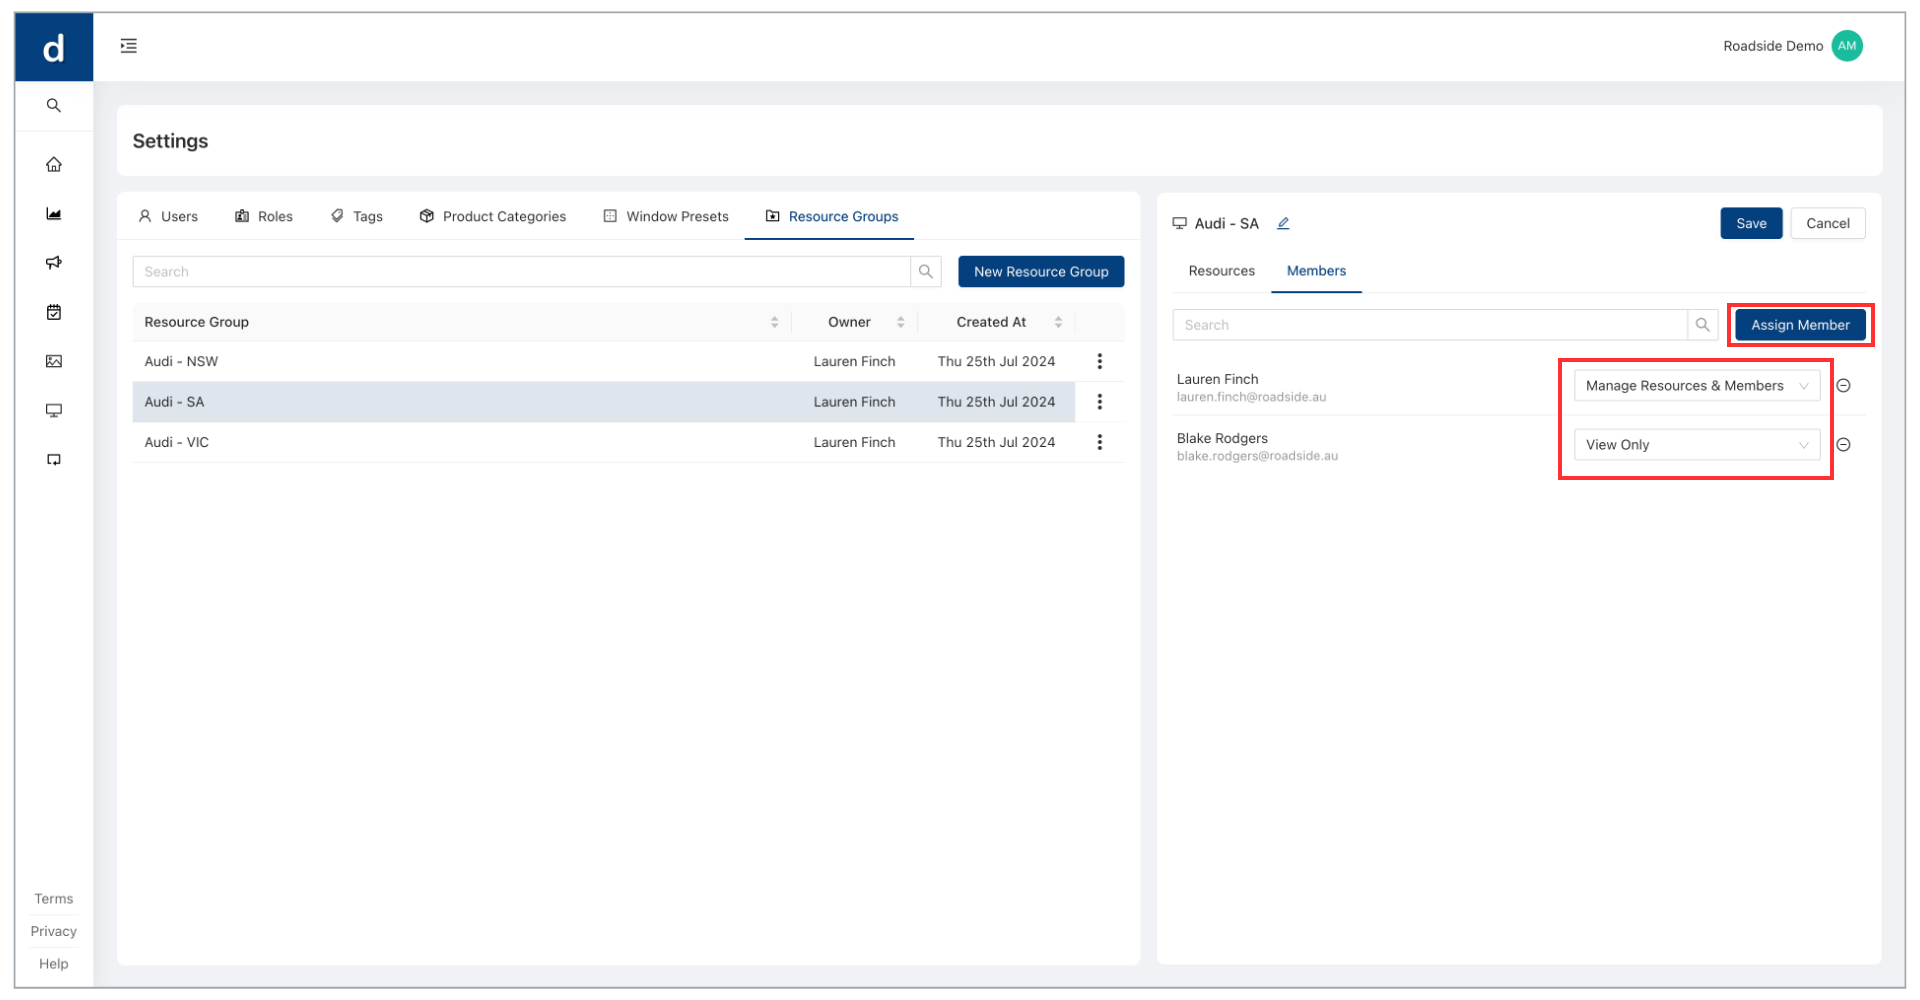
Once your group has been created and resources have been assigned, you can assign ‘Members’ to the Resource Group alongside the relevant permissions for each member.
Permission Levels:
- View Only: The member can view resources in this group. If the member has the ‘Role View’ or ‘Role Manage’ permission, they will also be able to see members in the group.
- Manage Resources: The member can assign and remove resources to and from the group.
- Manage Members: The member can assign and remove members within the group and update their membership permissions.
- Manage Resources & Members: The member can assign and remove resources and members within this group.
Accessing Resource Groups Within Resources
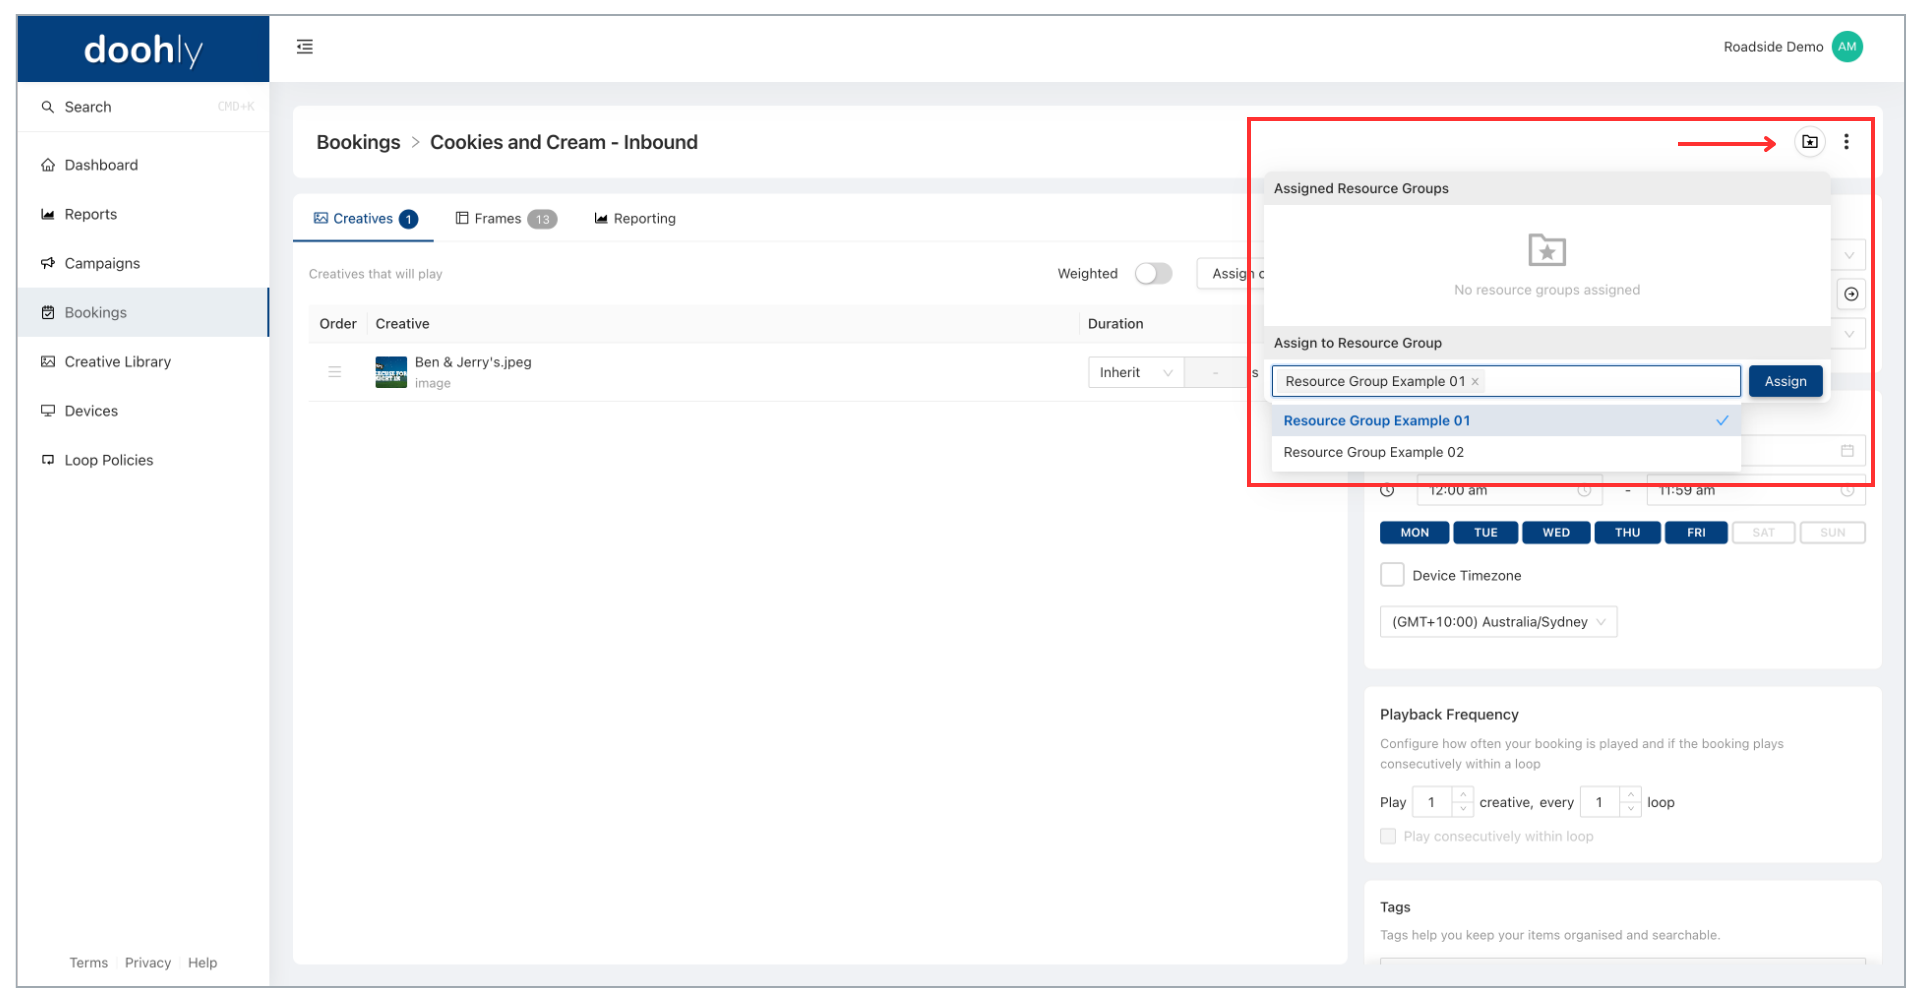
Once you click on a resource, you can see or assign Resource Groups via the ‘Starred Folder’ on the right-hand side of the heading.
If you have any questions or need assistance, please contact our Support Team: [email protected]
Updated 11 months ago
